


The Pacific Northwest is blessed with a plethora of sport fish species, both fresh and saltwater. Fly-fishing for them is exciting and productive, but to be consistently successful you need to know what flies to use and when to use them. This takes a knowledge of the fish you are pursuing and a knowledge of the foods they eat and how to imitate them. So rather than just tell you about my 10 favourite flies for the fish around here, I will do the reverse, I’ll start with each fish species and then give you a fly that works consistently. So, here we go.
Brown Trout
Brown trout are stocked in a number of locations around the northwest. Once they grow past about 14 inches long, these beautiful fish turn piscivorous and are suckers for sculpins and minnows. The best fly pattern I know to imitate sculpins is a Muddler or Marabou Muddler Minnow. Fish the fly deep along the bottom, prospecting close to log jams and undercut banks.
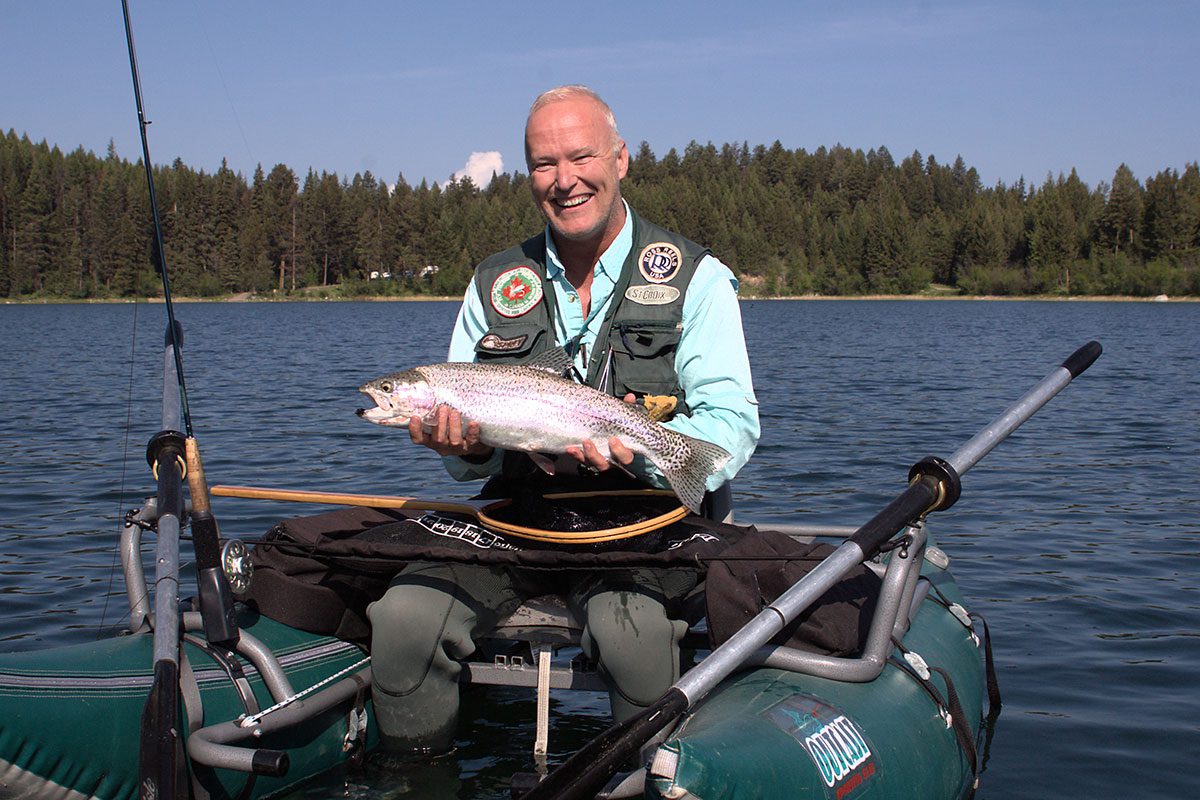
Rainbow Trout
Rainbows inhabit most of the streams and rivers across North America, and the Pacific Northwest is no different. These lovely fish can lock into a hatch and feed selectively on only that insect, and often only a specific life stage of that insect. It can be frustrating if you don’t know your hatches, but unbelievably productive when you get the right size, shape, color and motion of the fly correct. Many of our rivers and lakes have good mayfly and caddisfly hatches and rainbows love these little morsels. There are so many fly patterns to imitate the various life stages of each hatch it would take a small book to tell you about them all, but below are the four patterns I am never without and they work consistently:
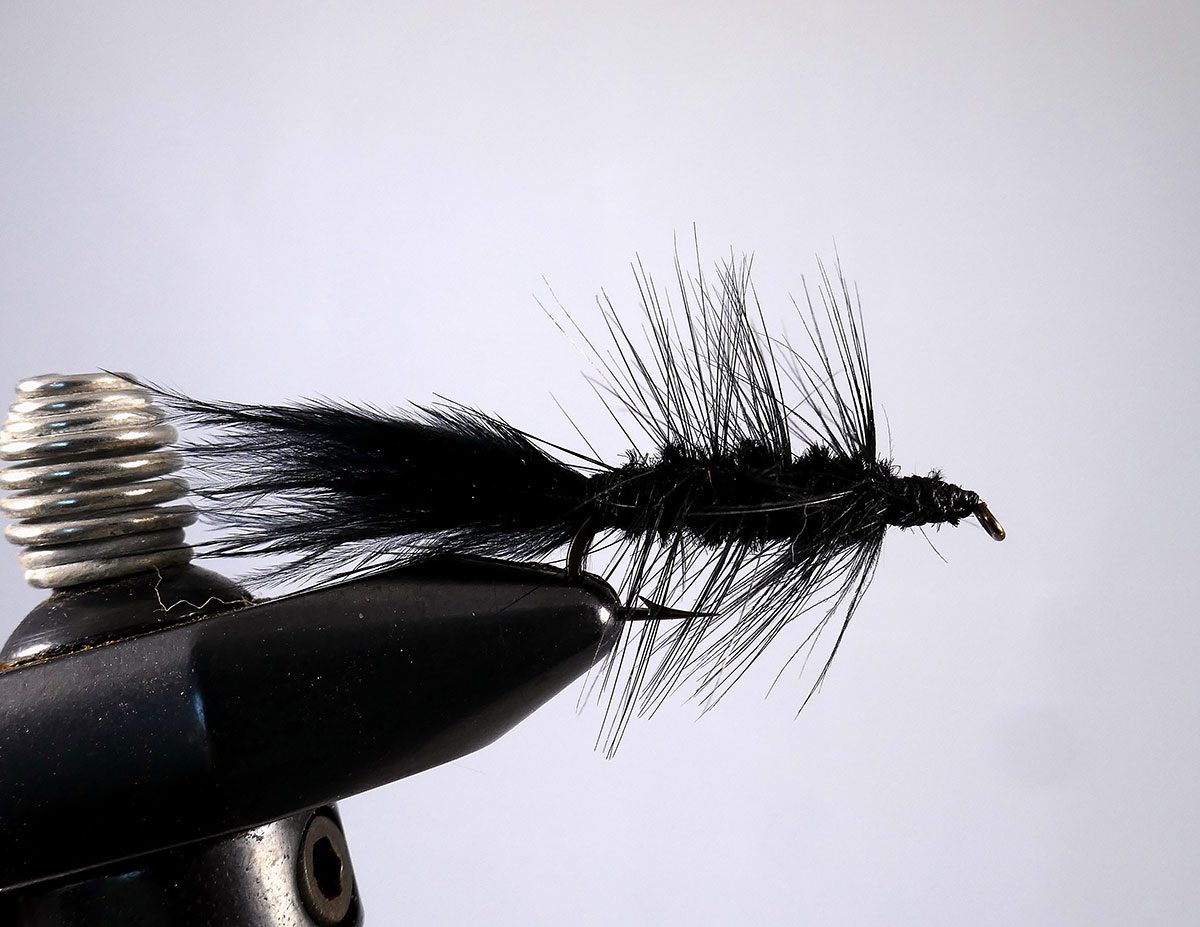
Lakes: Black Woolly Bugger
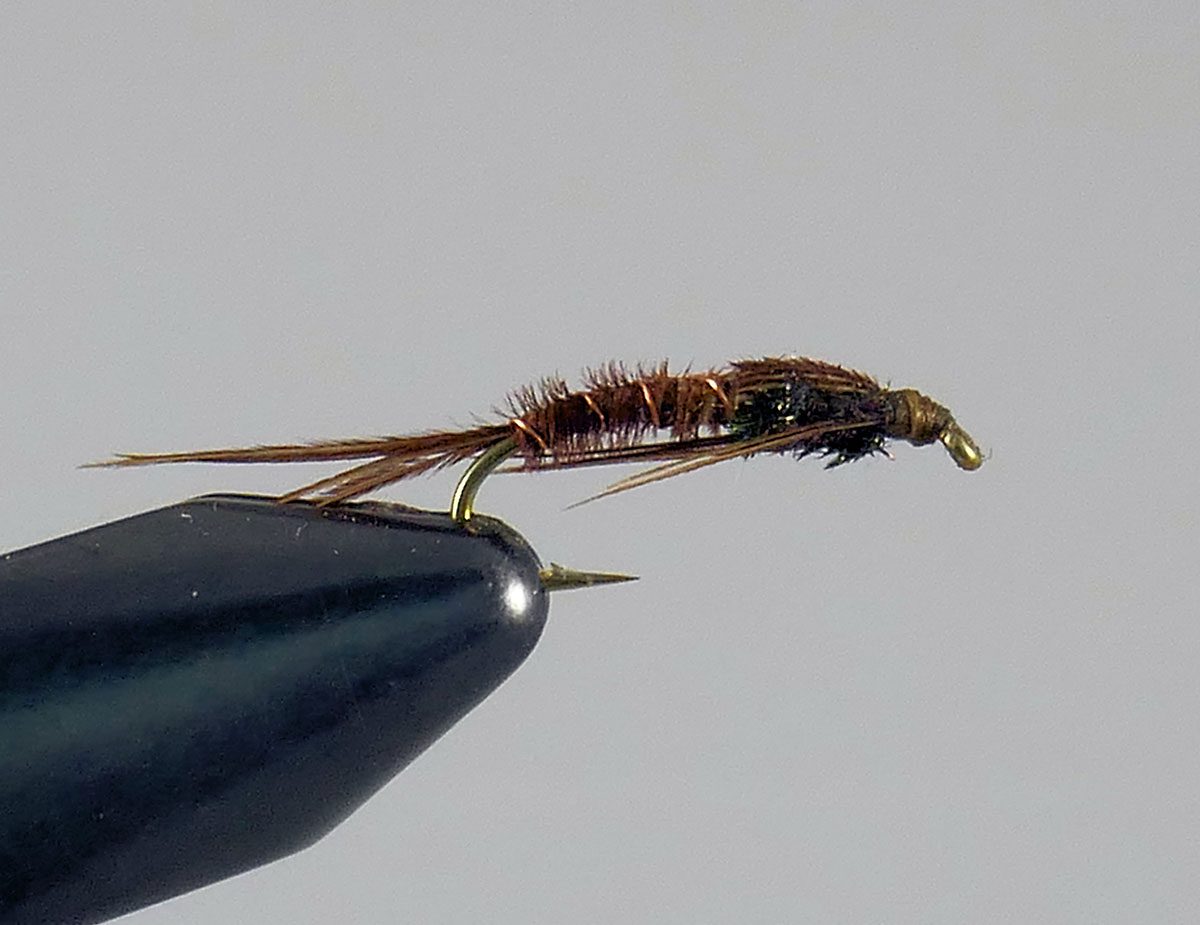
Streams: Pheasant Tail Nymph
Elk Hair Caddis
March Brown (dry)
Cutthroat Trout
Cutthroats are a true Northwesterner. They inhabit many of our lakes and streams. In some areas like where I live, they are protected by catch and release and size regulations in some waters, so that’s just a heads up for you. Cutthroat trout are a little like brown trout and a little like rainbow trout. Big cutthroats turn piscivorous and are even bigger suckers for minnow patterns than brown trout. Small to average cutthroats can also be taken on minnow patterns, but will just as readily come to a dry fly or a nymph just like the rainbows.
I like to fish for cutthroats in lakes using as stickleback pattern. It works really well and I have great success with it. In our streams they will take the patterns that work for rainbows or browns.
In coastal areas there are often populations of sea-run cutthroat trout. These are beautiful fish. While they can be hard to find sometimes, but if you locate them, they will fall prey to a Bead Head Muddler Minnow as easily as any other pattern I can think of.

Smallmouth Bass
Many lakes in the northwest have smallmouth bass in them. The vast majority, if not all, have gotten there through illegal plantings, but are still managed as a sport fish by the government. Regardless, they can be a lot of fun on the fly and they are quite tasty table fare as well. There are so many ways and patterns to fish for bass it’s hard to pick one pattern over all the rest, especially since bass are quite predatory, aggressive and thus relatively easy to catch. Some guys like to take them on big deer hair and rabbit dry flies and that can be a hoot, but I take them more consistently on wet flies.
Bass like big food. Things like frogs and sculpins catch their attention rather quickly. If you pursue them, try big swimmy patterns, they seem to work the best. I have tied my own pattern for bass. It’s a simple variation of the standard black Woolly Bugger pattern, I simply changed the body color to bright yellow chenille with a black chenille back and called it a Yellow-Bellied Woolly Bugger. The bass seem to like it and so I have put it in here for you to give it a try.
Coho
Coho salmon are arguably the Northwest’s greatest species to fly-fishing for. While I understand full well the joy and fun of hooking into a chinook or chum and the great fight that they put up, coho salmon tear out line with impunity and love to jump and dance and tail walk and basically give you a heart attack. When I first started to pursue coho salmon, I had a heck of a time trying to find flies that were consistently successful. I started asking the fellows around me what they were using; some showed me, some did not. The most common and most successful pattern that I found being used by the other fly-fishers was the Mickey Finn. The second most common pattern was the American Coachman. I combine the two to produce of very good coho pattern which I call the Coho Sunset. Strange, it works best at sunrise. However, especially for those of you who do not tie your own flies, the Mickey Finn is a great choice. This makes total sense since coho like to eat bait fish. They like their food to be alive and they like to chase it. Strip your fly as fast as you can, be ready for the strike, and hang on.
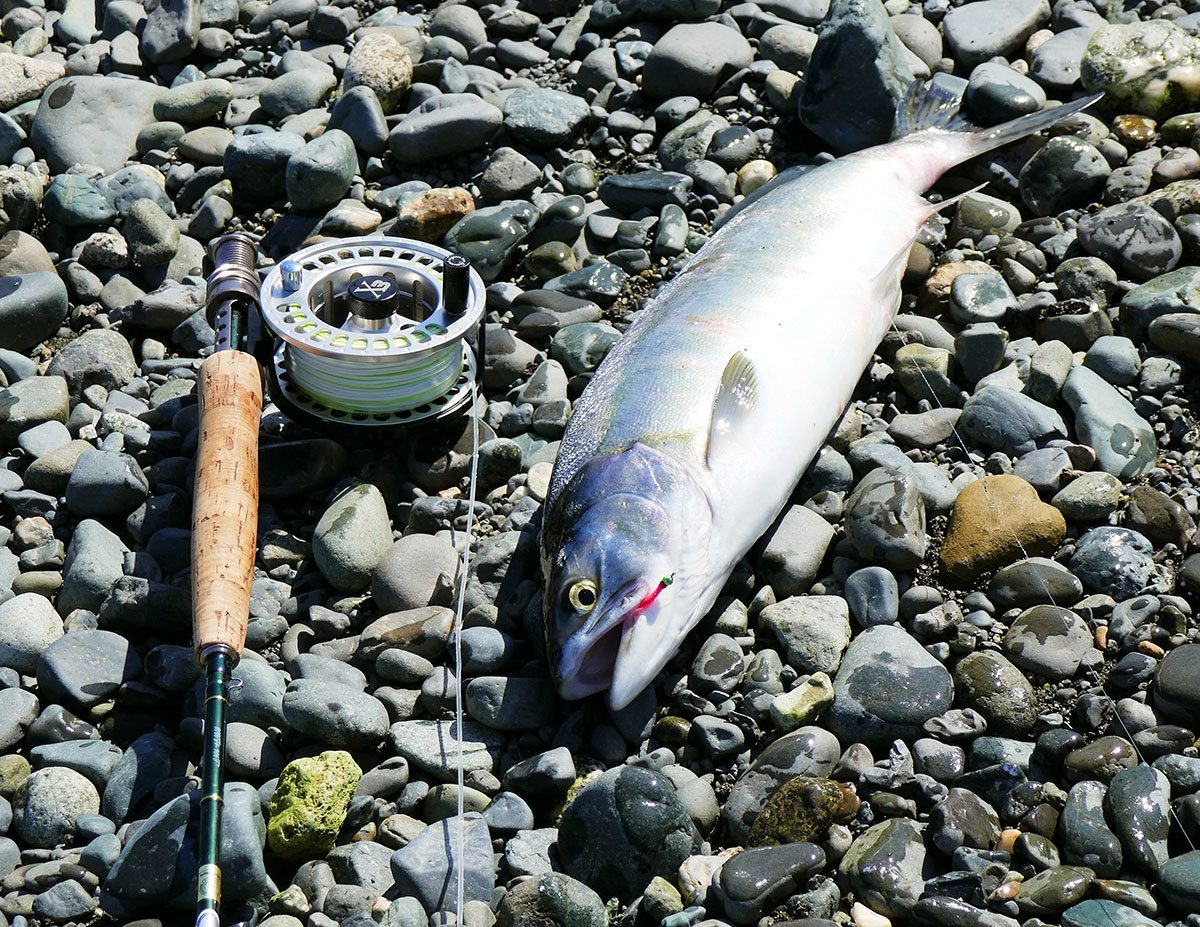
Pink Salmon
Pink salmon are just fun to fish for. The pink salmon run can be so prolific here in the Northwest it can be mind-boggling. It is the most amazing thing to stand in the river estuary with literally hundreds if not thousands of fish within casting distance. It’s even more mind-boggling when they get lockjaw and refuse to bite. I have spent hour upon hour, cast after cast and caught nothing. On the other hand, I have lucked into fresh fish just entering the river mouth and caught a fish every cast for 2 hours straight; unbelievable.
I would say 80 to 90% of all pink salmon flies are pink in color. Pink salmon’s primary food is krill (euphausiids). So obviously, small pink flies will imitate their food. There are purple, blue, green, and other combinations of colors but pink by far is the most common and the most successful. While there are many different patterns that different fly-fishers prefer for pinks, everyone has one pattern for sure in their box: the Chartreuse Bead Head Pink Handlebar. It’s such a simple tie and you can buy it in pretty much any fly-fishing shop that stocks pink salmon flies.
So, there you have it, 10 flies you should not be without when you are fly-fishing the Northwest. There are, of course, many more patterns that are used here and I use many more myself, but if I was restricted to fishing with only 10, these would be them. Stock up on them and go fishing.
How to Tie a Fly
Muddler Minnow


MATERIALS:
Hook: Mustad 9672 or equivalent, sizes 1/0- 12
Thread: Brown
Tail: Mottled turkey quill
Body: Flat gold tinsel
Underwing: Brown Calf Tail
Overwing: Mottled turkey quill
Hackle: Deer hair, tied in as collar
Head: Deer hair, spun and clipped
TYING STEPS
- Tie in a tail of mottled turkey quill.
- Tie in a length of flat gold tinsel and wind forward to create the body. Make sure you leave enough bare hook at the head to tie in and spin the deer hair head.
- Tie in an underwing of brown calf tail behind the head, tail length.
- Tie in the overwing of mottled turkey quill, tail length.
- Tie in deer hair as a collar, about body length or a bit shorter.
- Tightly spin on deer hair for the head.
- Whip finish.
Black Woolly Bugger
MATERIALS:
Hook: Mustad 9672 3X long #10 – 14
Thread: Black monocord
Tail: Black marabou
Body: Black chenille
Hackle: One or two black hen hackles, palmered.
TYING STEPS
- Wrap on tying thread at the eye of the hook. Wind down to the butt.
- Secure the marabou tail in place. It should be about shank length.
- Tie in the black hackle by the tip. Use two if you want the hackle thick, one if you want it sparse. The hackle fiber length should be about one and a half to two times the hook gap.
- Wrap the thread to just behind the eye.
- Wrap the chenille forward making an even body and tie off.
- Palmer the hackle forward and tie off behind the eye.
- Trim any excess, whip finish the head and cement.
Pheasant Tail Nymph
MATERIALS:
Hook: Tiemco 2302 #12-20
Thread: Brown 8/0
Tail: Pheasant tail fibers
Rib: Copper wire
Abdomen: Pheasant tail fibers
Thorax: Peacock herl
Wingcase: Pheasant tail fibers
Legs: Pheasant tail fibers
TYING STEPS
- Wrap on tying thread at the eye of the hook. Wind down to the butt.
- Secure the tail in place, then attach the copper wire and the pheasant fibers for the abdomen.
- Wrap the thread back half way up the hook shank.
- Wrap the pheasant fibers forward to form the abdomen. Stop half way up the shank. Tie off and trim excess.
- Wrap the copper wire forward to form a rib. Wrap in the opposite direction to the way you wrapped the pheasant fibers. Stop half way up the shank. Tie off and trim excess.
- Tie in the pheasant fibers to be used for the wingcase, and then tie in the peacock herl.
- Wrap the herl forward to the head of the fly, forming the thorax. Tie off and trim excess.
- Pull the pheasant fibers over the back to form the wingcase. Tie down and trim the excess.
- Tie in a wing of pheasant tail about shank length. Tie off and trim excess.
- Tie in 2 – 4 strands of pheasant fibers on each side of the thorax to form the legs. They should reach to about the hook point. Trim the excess. Form the head with the thread.
- Whip finish the head and cement.
Elk Hair Caddis
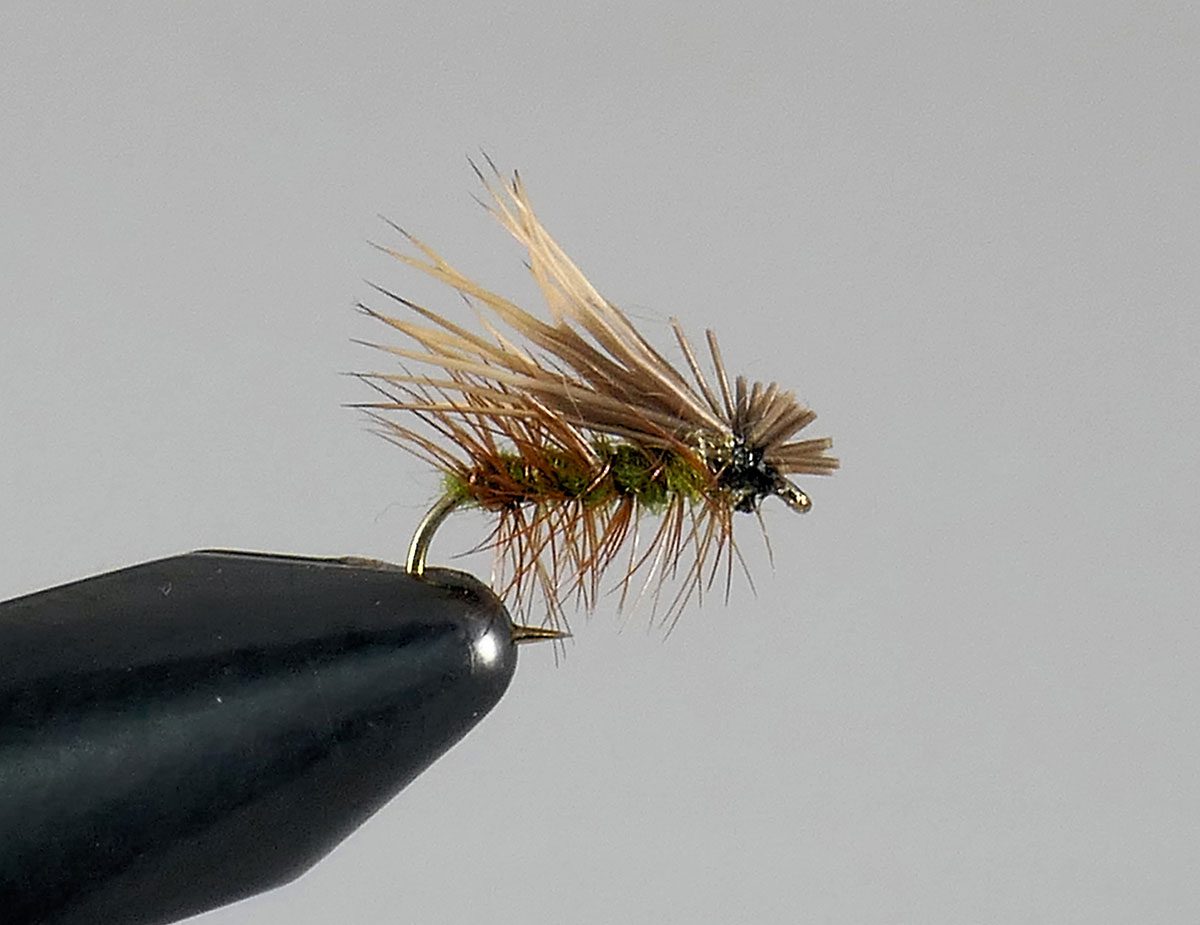
MATERIALS:
Hook: Mustad 94840 #6 – 16
Thread: To match natural body color
Body: Dubbed wool or spun deer hair dyed to color
Rib: None or palmered furnace or ginger hackle
Wing: Deer or elk hair (11/2 times the body length)
TYING STEPS
- Tie in thread. Wrap to butt. Tie in hackle.
- Form a dubbing loop. Dub on the body material and wrap forward to head forming fairly fat body. Tie off and trim excess.
- Tie in hackle, tip first and palmer the hackle forward over the body. Tie off and trim excess.
- Tie in the deer hair wing. Avoid flaring it too much. Wing should lie tent-like over the back of the fly. Tie off and trim excess.
- Whip finish and cement the head.
March Brown Dry Fly
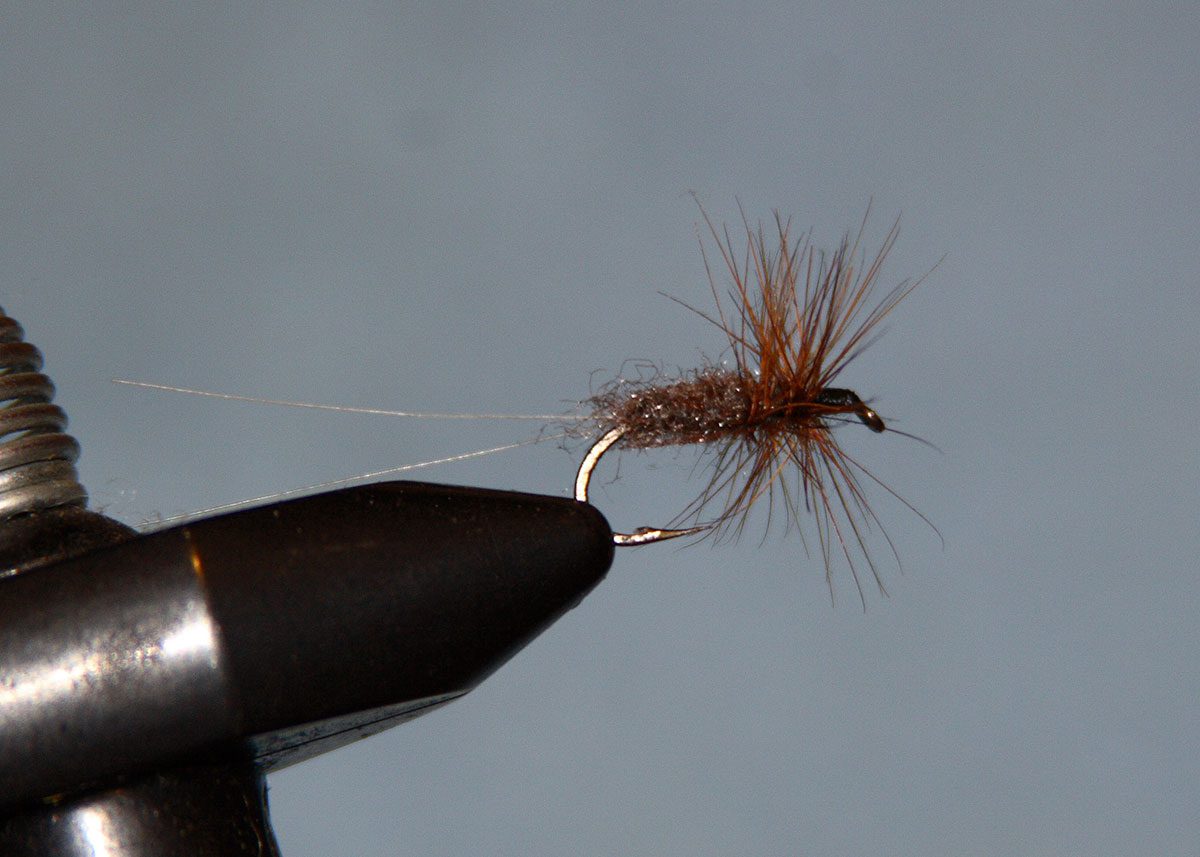

MATERIALS:
Hook: Mustad 94840 (or equivalent) sizes #10 – #16
Thread: Brown 8/0
Tail: Two or three strands of white or cream-colored horse mane.
Abdomen: Seal, poly-dubbing or blended antron
Thorax/Wing: One “variant” length hackle and one standard gap-length hackle.
TYING STEPS
- Wrap on tying thread at the eye of the hook. Wind down to the butt.
- Secure the tail in place. The tail should be 11/2 the length of the hook shank, at least.
- Form a dubbing loop and dub on medium brown seal fur or antron. Wrap to the start of the thorax.
- Tie in both hackles at the start of the thorax. Then wrap the variant length hackle forward first. Tie it off and trim the excess.
- Trim all the hackle fibers that splay below the shank off so there are only horizontal or higher barbules left.
- Wrap the standard-length hackle forward, working it between the variant hackle fibers. Tie it off and clip the excess.
- Whip finish the head and cement.
Stickleback Minnow
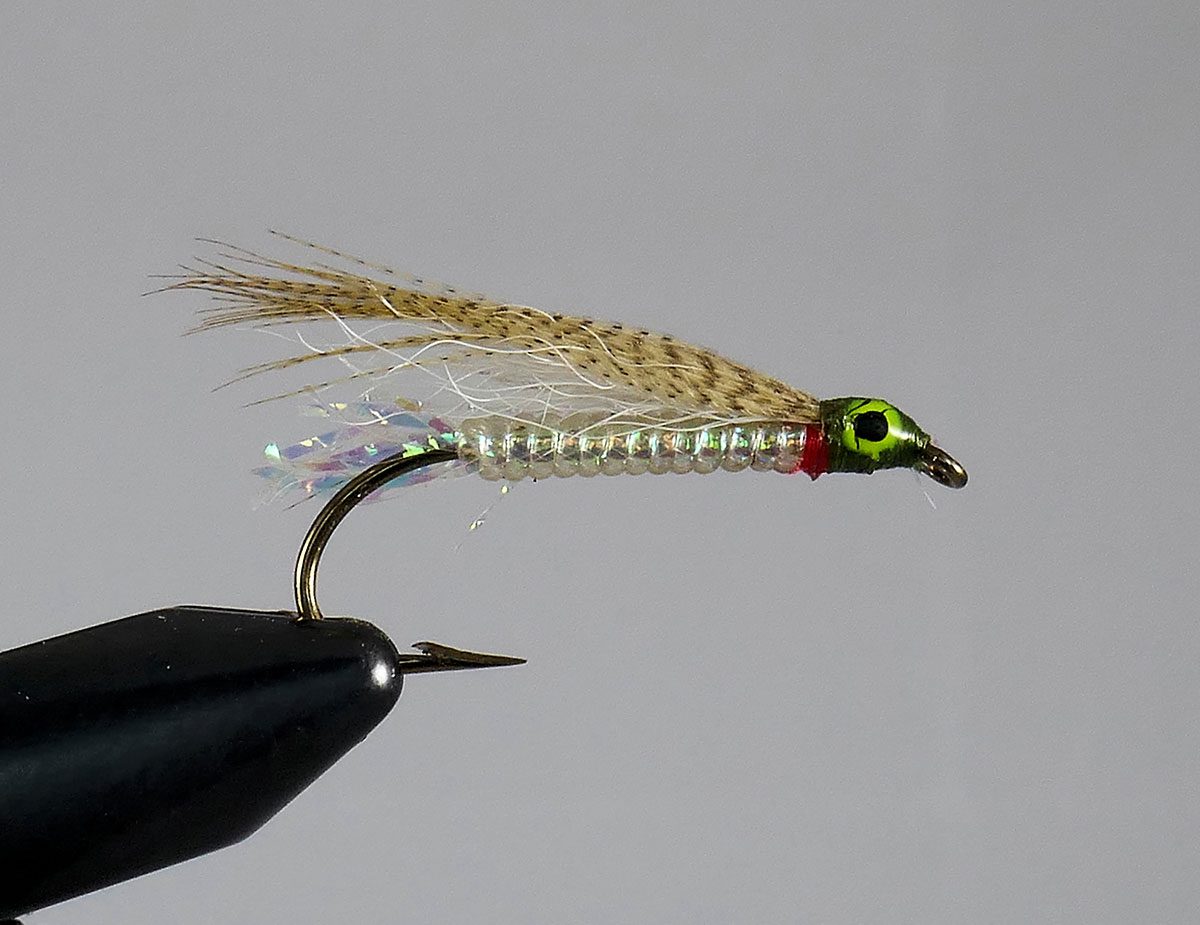
MATERIALS:
Hook: Mustad 9672 or equivalent, sizes 10- 12
Thread: Black
Body: Holographic mylar tubing
Rib: Monofilament line
Underwing: White bucktail
Overwing: Barred mallard flank
Hackle/Throat: Red thread or red hackle as gills
Head: Black thread with eyes. Epoxied.
TYING STEPS
-
- Tie in the monofilament rib material at the butt of the hook.
- Slide on the holographic tubing over the shank, being sure to leave a bit loose to for a short tail.
- Wrap the monofilament forward around the tubing to the head.
- Tie off the tubing and monofilament by tying in the red thread. Be sure to wrap the red thread back a little so some will show as gills. If you want to use red hackle then tie those in now and secure the hackle, monofilament and tubing all at once.
- Tie in a somewhat sparse underwing of white bucktail and then an overwing of barred mallard flank.
- Form a black head by wrapping the black thread and then whip finish.
- You can either now epoxy the head and paint on eyes, or you can stick on eyes and then epoxy the entire head, or you can simply leave the head without eyes and cement the head.
Bead Head Muddler Minnow Fly
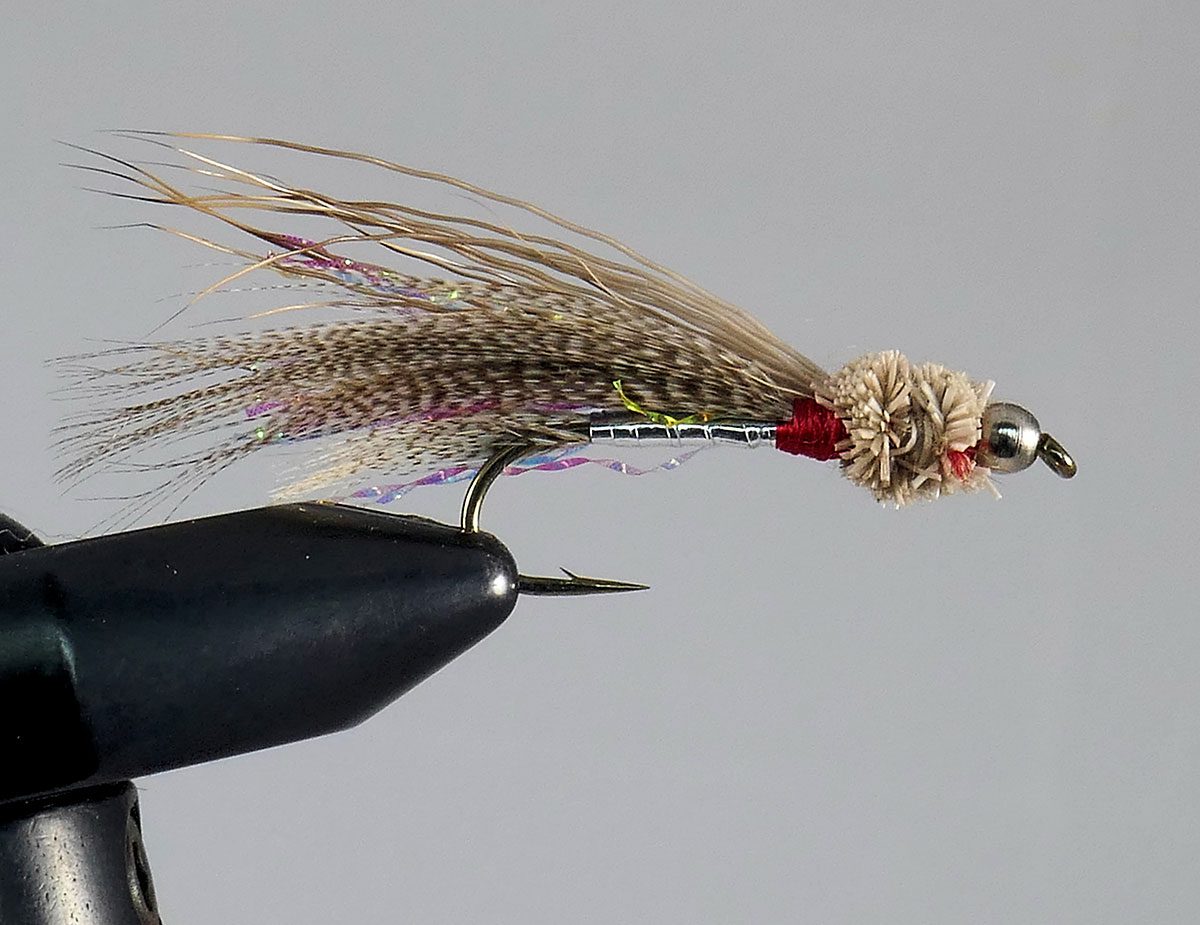
MATERIALS:
Hook: Mustad 9672 or equivalent, sizes 1/0- 12
Thread: Red
Tail: Barred mallard flank
Body: Flat silver tinsel
Underwing: Crystal flash
Middle Wing: Barred mallard flank
Overwing: Deer hair
Hackle/throat: Red thread
Head: Deer hair, spun and clipped and silver bead
TYING STEPS
- Slide on the silver bead head. Wrap thread back to the butt.
- Tie in a tail of barred mallard flank.
- Tie in a length of flat silver tinsel and wind forward to create the body. Make sure you leave enough bare hook at the head to tie in and spin the deer hair head.
- Tie in an underwing of crystal flash. The color is your choice (I like holographic), tail length.
- Tie in the middle wing of barred mallard flank, tail length or a bit longer.
- Wrap some of the red thread as a collar.
- Tightly spin on deer hair for the head and overwing. Make sure the hair is long enough to be equal to the length of the middle wing.
- Clip the spun deer hair to make a hair head, being sure to leave a bit as an overwing on top.
- Whip finish.
Yellow-Bellied Woolly Bugger
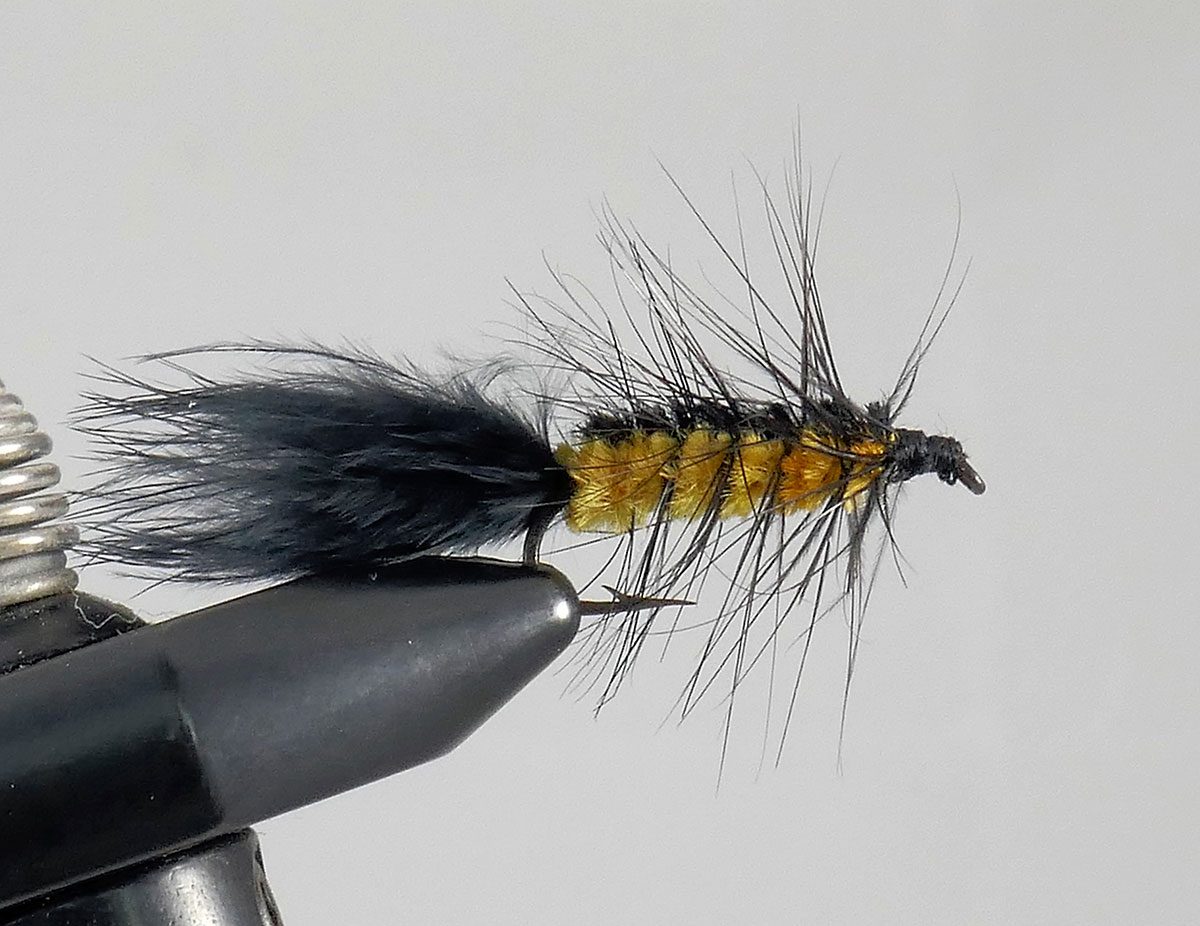

MATERIALS:
Hook: Mustad 9671 3X long shank #8 -#12
Thread: Black monocord
Tail: Black marabou feather
Body: Yellow chenille
Rib: Palmered black Hackle
Shellback: Black chenille
Beard: None
TYING STEPS
- Wrap on tying thread and tie in the tail of black marabou, about shank length long.
- Secure to the butt the black hackle, by the tip.
- Tie in the black chenille.
- Tie in the yellow chenille and wrap the yellow chenille to just behind the eye. Tie off and cut off excess.
- Pull the black chenille over the back, tie off and cut off excess.
- Palmer the black hackle forward over the whole body.
- Tie off and whip finish the head.
Mickey Finn Fly

MATERIALS:
Hook: Mustad 34011 #4 – 8
Thread: Black or red monocord
Body: None, or silver/holographic mylar tinsel
Wing: 50/50 red and yellow bucktail
TYING STEPS
- Wrap on tying thread at the eye of the hook. Wind down to the butt if you plan on tying in a silver mylar tinsel body, else leave at the head.
- Secure the tinsel in place, then wrap the thread back to the head of the fly.
- Wrap the tinsel forward making an even body and tie off.
- Tie in a clump of bucktail consisting of 50% red and 50% yellow hairs. Before tying them in, roll the mixture between your fingers several times to mix the fibers together. Tie in the fibers at the head, and trim the excess.
- Whip finish the head and cement.
Coho Sunset
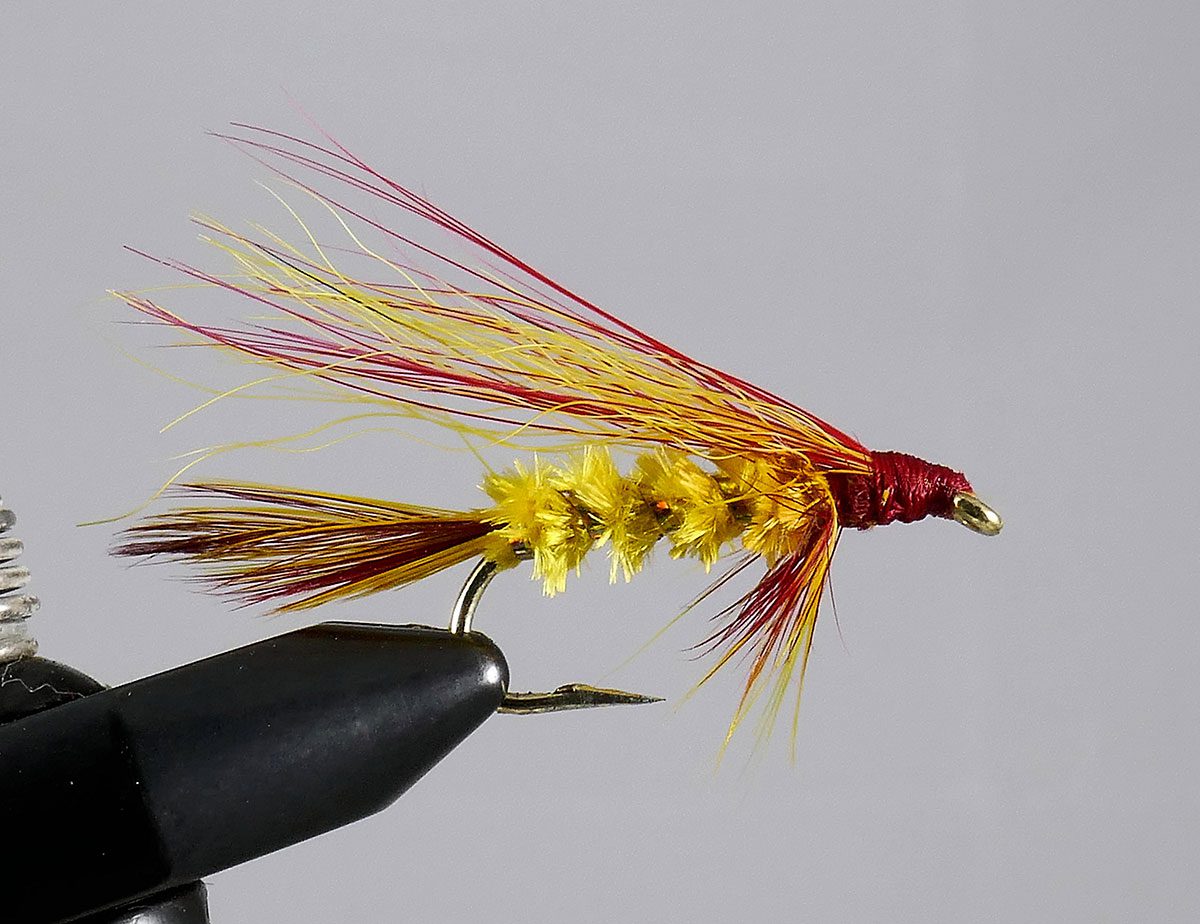
MATERIALS:
Hook: Eagle Claw L1197N or Mustad 34007/34011 stainless Size #6
Thread: Red monocord.
Tail: 50/50 mix of red and yellow bucktail, shank length.
Body: Yellow chenille.
Rib: Flat gold tinsel.
Beard: 1 red and 1 yellow hen hackle
Wing: 50/50 red and yellow bucktail
TYING STEPS
- Wrap on tying thread and secure onto the hook shank a tail of 50/50 mix of red and yellow bucktail about shank length
- Tie in, at the butt, a length of medium flat gold tinsel and then the large yellow chenille.
- Wrap the chenille to the eye of the hook and tie it off.
- Wrap the tinsel forward to the eye to form the rib and tie it off.
- Tie in 1 red and 1 yellow hen hackle and wrap once or twice and tie them off. The hackle length should only reach the hook point (beard length).
- Tie in 50/50 red and yellow bucktail about tail length as shown.
- Tie off and whip finish.
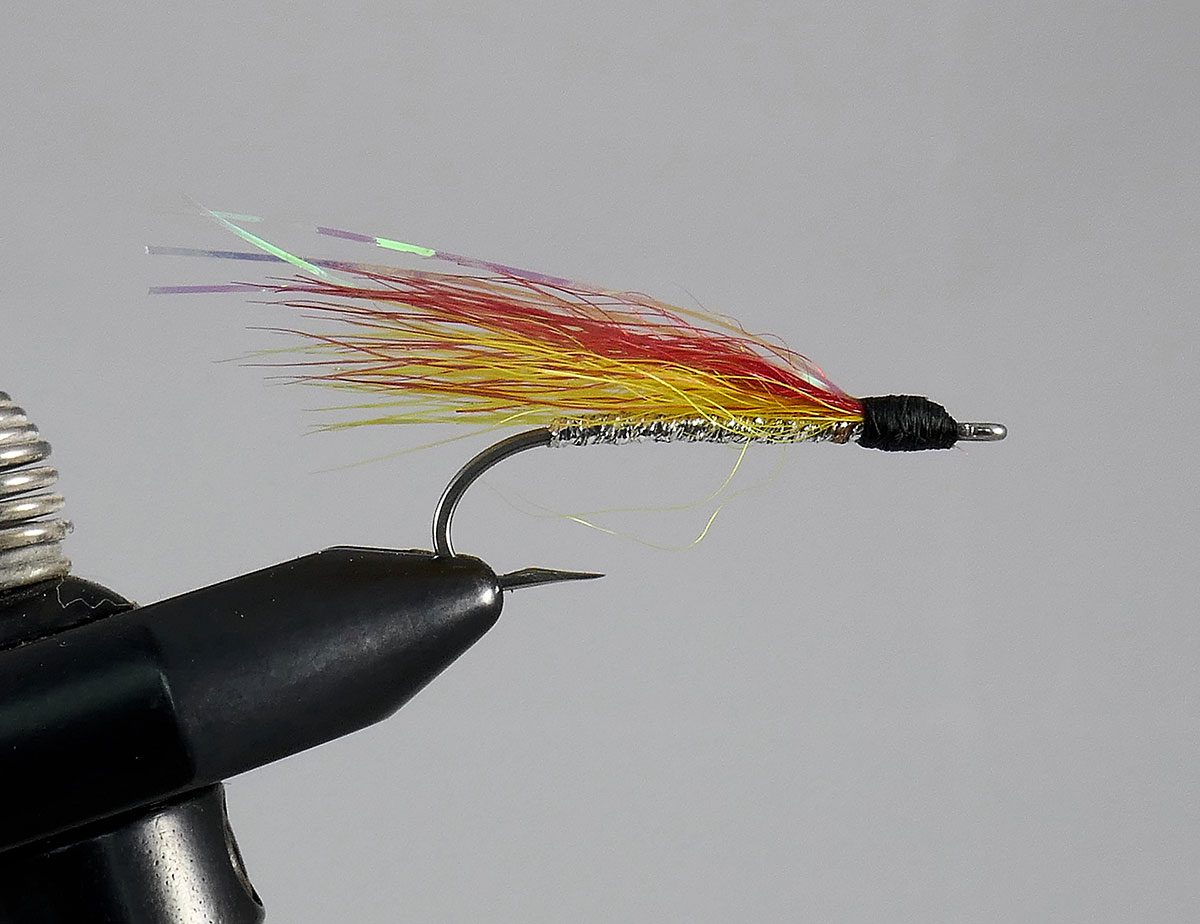
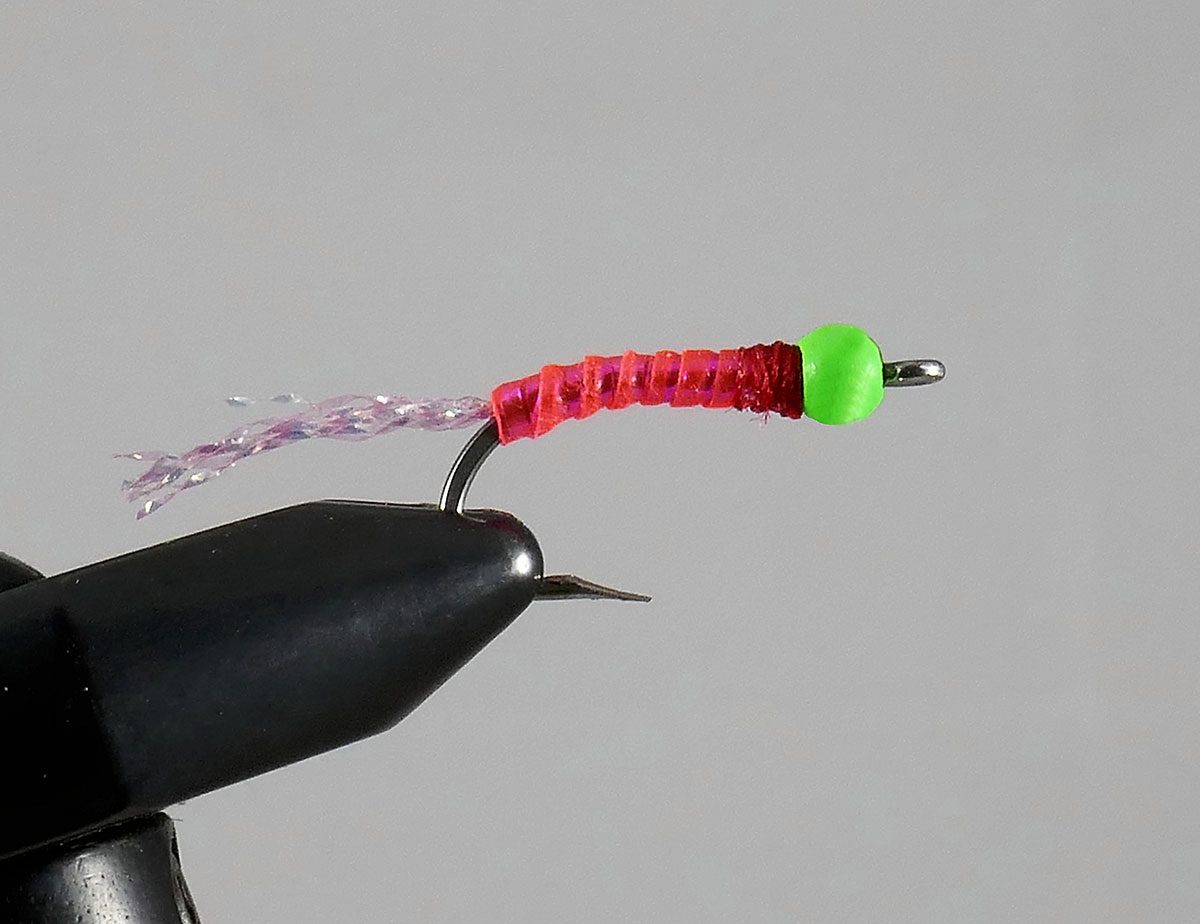
Bead Head Handlebar
MATERIALS:
Hook: Mustad 34011 Stainless Steel # 6
Thread: Red or fluorescent pink Black 6/0 or 8/0
Head: Chartreuse bead
Tail: Opalescent Crystal Flash
Underbody: Flat silver tinsel
Overbody: Fluorescent pink Lazer Wrap
TYING STEPS
- Slide the bead onto the hook making sure the narrow part of the hole is towards the eye.
- Wrap on the thread and wind to the butt.
- Tie in 3 – 5 strands of shank-length crystal flash.
- Tie in a length of silver tinsel long enough to wind to make the underbody.
- Tie in a length of Lazer Wrap long enough to wind to make the overbody.
- Wind the thread to just behind the bead.
- Wrap the tinsel forward making sure to cover the entire shank with no gaps. Tie it off and trim excess.
- Wind the Lazer Wrap in similar fashion. If you warm the material in hot water before using it, it will stretch and wrap more easily.
- Whip finish and cement.


