


You’ve spent hours in the stand, made the perfect shot, and now you’re staring at 60 pounds of prime venison. Freezer space is tight, and you’re wondering how to preserve all this meat without losing flavor or quality. That’s where canning venison comes in—it’s one of the oldest and most reliable ways to store your harvest for the long haul.
For hunters who process their own deer, canning venison offers something freezing can’t match: shelf-stable meat that’s ready to eat straight from the jar. There’s been a real resurgence in DIY preservation lately, with more outdoorsmen realizing they don’t need to rely solely on modern appliances. When done right, canned deer meat stays good for years and actually improves in tenderness over time.
Why Canning Venison Makes Sense
Simply put, freezers fail. Power outages happen, especially in rural areas where many hunters live. One blown compressor or extended blackout can cost you an entire season’s worth of meat. Canned venison doesn’t care about electricity. It sits on your shelf, ready whenever you need it.
Compare this to jerky, which is great for snacks but not exactly meal material. Freezing works fine until you run out of space or forget about that package buried in the back for two years. Canning gives you cooked, tender meat that you can grab and use immediately—no thawing required.
The shelf life alone makes it worth considering. Properly canned deer meat lasts 2-3 years minimum, and many hunters report using jars that are even older with no issues. You can throw a jar in your truck for hunting camp, take it backpacking, or keep it in a cabin without worrying about refrigeration. Try doing that with frozen venison.
Flavor-wise, the meat stays moist and develops a richness you don’t get from freezing. The pressure canning process breaks down tougher cuts, turning shoulder roasts and round steaks into fork-tender meat that falls apart. It’s perfect for those less-than-prime cuts you’d otherwise grind into ground venison using a meat grinder.

Essential Equipment and Ingredients
Here’s the non-negotiable part: you need a pressure canner to safely can deer meat. This isn’t optional, and it’s not something you can work around. Venison is a low-acid food, which means dangerous bacteria like botulism can survive in regular boiling water. A pressure canner creates temperatures above 240°F, hot enough to kill everything that could make you sick.
Don’t confuse a pressure canner with a pressure cooker—they’re different tools. You need the actual canner with a proper gauge and capacity for multiple jars. Models like the Presto or All American are popular with hunters because they’re reliable and hold plenty of jars at once.
Beyond the canner, you’ll need standard canning supplies: Mason jars (pint or quart size), new lids, rings, and a jar lifter. For ingredients, salt is your baseline—about a teaspoon per quart jar. Some hunters like adding beef or venison broth to their jars for extra moisture and flavor.
Optional seasonings can really elevate your canned meat. Black pepper, garlic powder, dried onion, and bay leaves all work great. If you’re planning to use the meat for specific dishes later, season accordingly—Italian herbs for pasta, chili powder for tacos, or ranch seasoning for pot roast sandwiches.
Preparing for Canned Venison
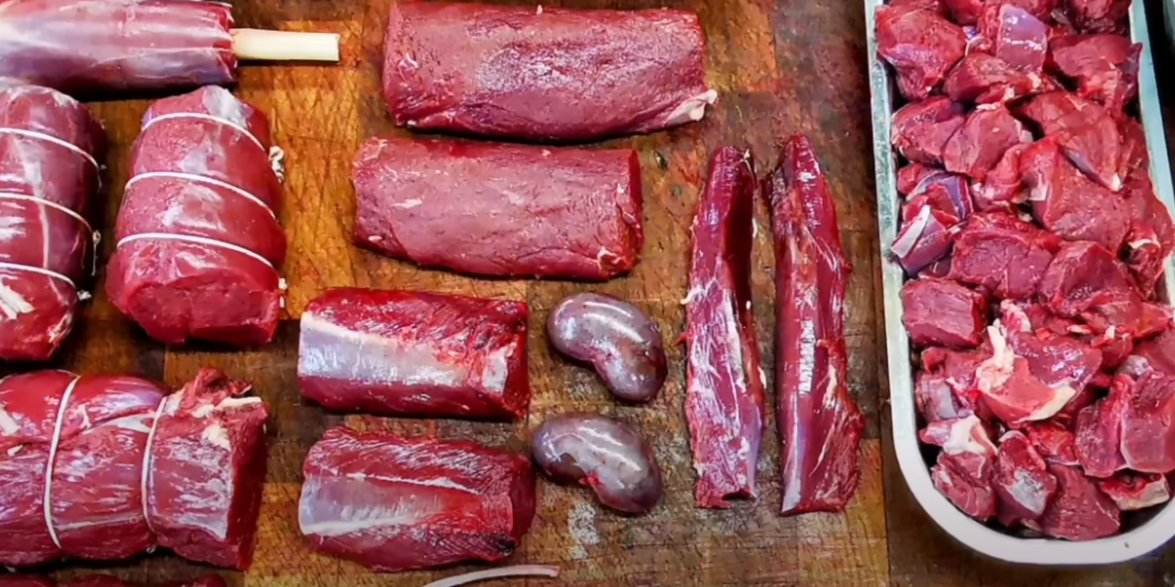
Start with clean, well-trimmed meat. This is where attention to detail pays off. Remove every bit of fat, silverskin, and connective tissue you can find. Deer fat doesn’t taste good and turns rancid quickly, even in sealed jars. Trim it all away—be ruthless about it.
Cut your meat into chunks or cubes, roughly 1-2 inches depending on whether you’re using pints or quarts. Smaller pieces work better for stews and chilis, while larger chunks or strips are perfect when you want pot roast-style meat. Some hunters prefer cutting roasts into strips that fit through regular-mouth jars, which tend to seal more reliably than wide-mouth versions.
Keep everything cold while you work. Bacteria multiply fast at room temperature, so process your meat in batches if needed. Clean your cutting board, knives, and work surfaces thoroughly—food safety starts way before the meat goes into the jar. If you’re working with a whole deer, consider saving the tenderloins and backstrap for fresh cooking like this venison roast recipe, and can the tougher cuts.
Don’t forget about organ meats if you’re into that. The liver can be prepared fresh using techniques from this venison liver recipe, but stick to muscle meat for canning.

Step-by-Step: How to Can Deer Meat
You’ve got two solid methods for canning deer meat with a pressure cooker: raw pack and hot pack. Raw pack means stuffing raw meat straight into your jars—it’s the faster route. Hot pack requires browning the meat beforehand, which adds a layer of flavor and gives you better texture in the final product.
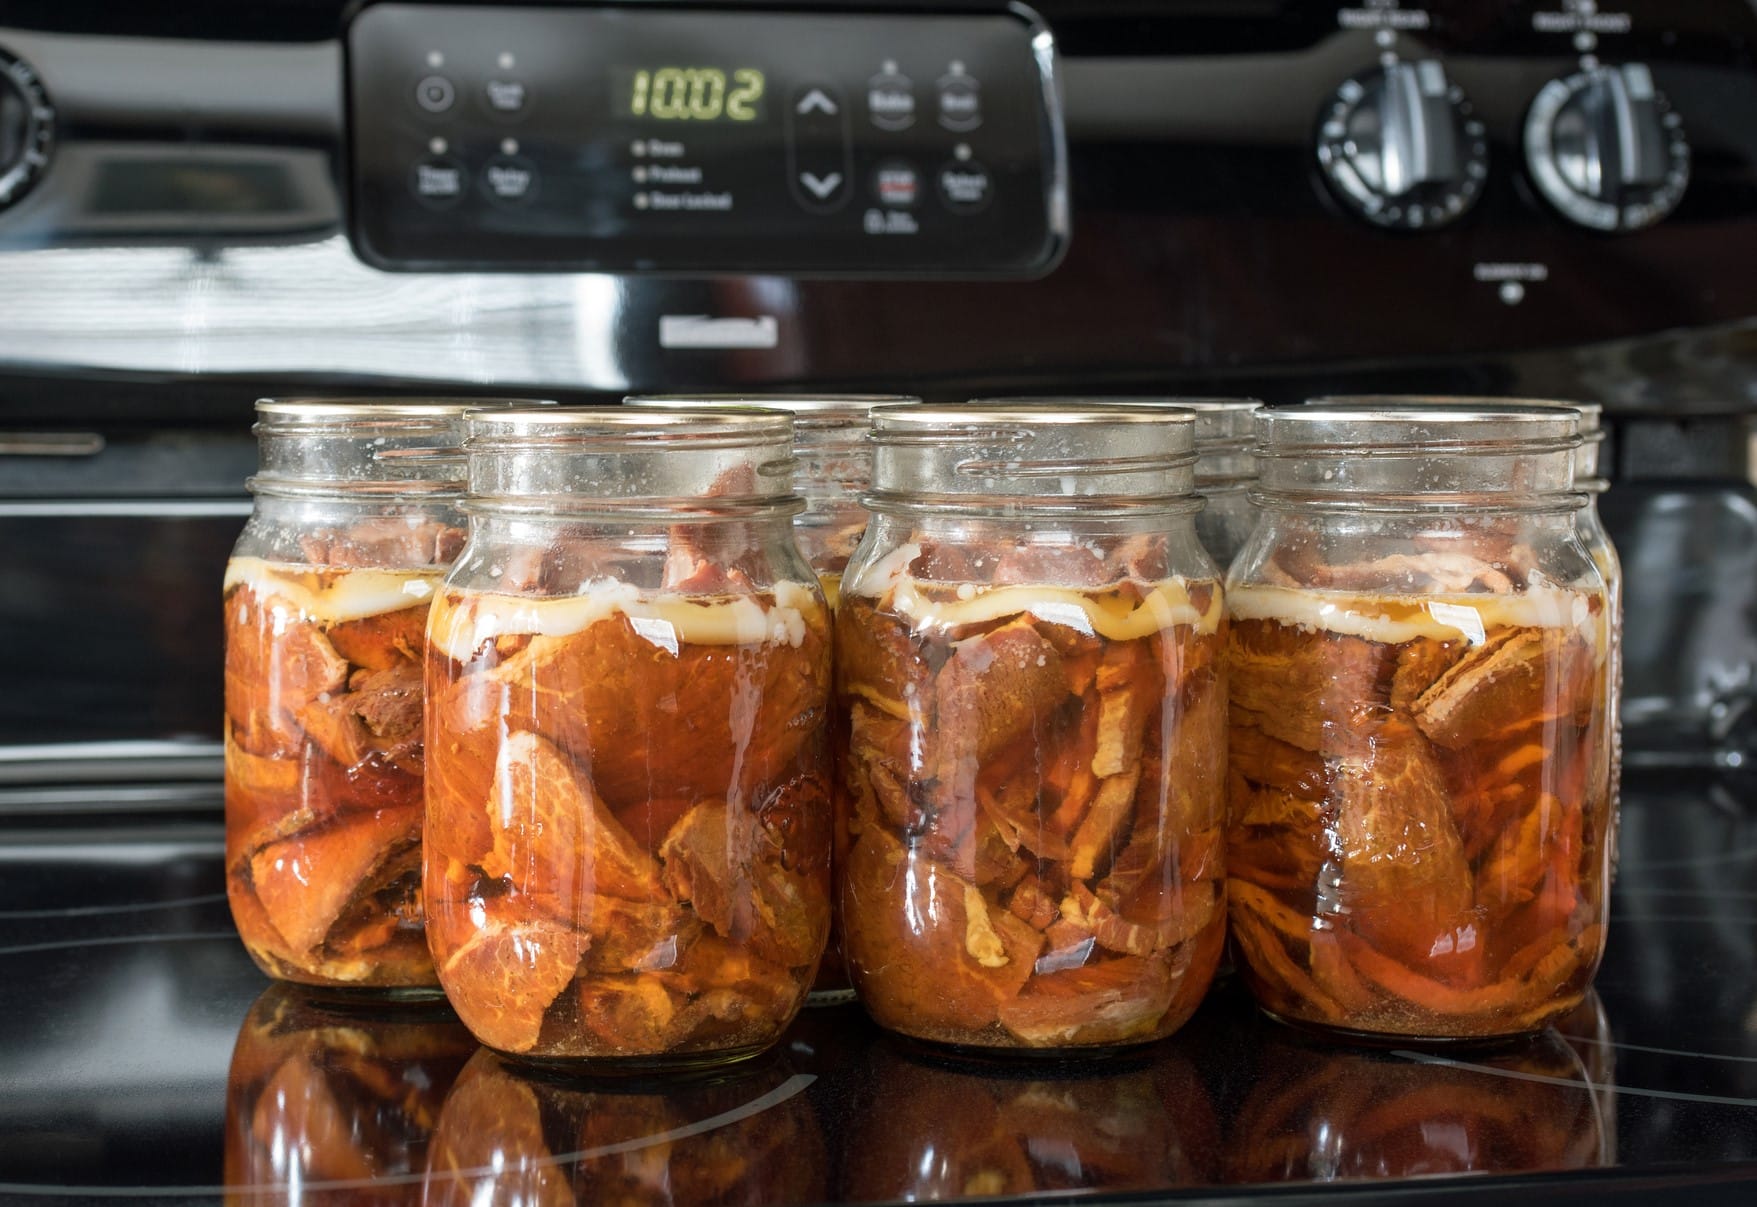
Step 1: Pack Your Jars
Fill your sterilized jars with meat chunks, but leave about an inch of space at the top. This headspace isn’t optional—the meat expands as it cooks and needs room to release its natural juices. Cramming too much in there is asking for seal failures.
Sprinkle your salt over the meat: one teaspoon for quarts, half a teaspoon for pints. Toss in whatever seasonings you’re planning to use—black pepper, garlic powder, bay leaves, whatever fits your taste. Broth is an option if you want extra liquid, but the venison makes plenty of its own juice during processing.
Step 2: Prepare the Jar Rims
Take a clean, damp cloth and wipe around the rim of each jar. You’re looking for any bit of meat, grease, or seasoning that might’ve landed up there. Even the smallest particle can wreck your seal, so be thorough about this step.
Set your new lids on top—don’t reuse old ones—and screw the bands down fingertight. You want them snug but not cranked down hard. Over-tightening actually prevents air from escaping during processing.
Step 3: Load and Vent the Canner
Pour 2-3 quarts of water into the bottom of your pressure canner and set the rack inside. Load your jars onto the rack—they shouldn’t be touching the water or each other. Put the lid on your canner and crank up the heat.
Let it heat without the pressure weight in place. You’ll see steam start pouring out of the vent pipe. Once it’s venting steadily, set a timer for 10 minutes and let it keep going. This step pushes all the air out of the canner, which is crucial for proper processing.
Step 4: Bring to Pressure and Process
After venting, add your weighted gauge and watch the pressure climb. You’re aiming for 10 pounds of pressure at sea level. Once the gauge hits that mark, start your timer—75 minutes for pint jars, 90 minutes for quarts.
Keep an eye on things and adjust your burner as needed to maintain steady pressure. You don’t want wild swings up and down. If pressure drops below 10 pounds, you’ll need to bring it back up and restart your timer from zero.
Step 5: Account for Altitude
Living at elevation changes everything with pressure canning. Above 1,000 feet, you need more pressure to reach the same sterilization temperature. Check a proper canning chart for your specific altitude—this isn’t something to eyeball or guess at. Getting it wrong means risking spoiled meat or worse.
Step 6: Cool Down Naturally
When your timer goes off, turn off the heat and walk away. Let the canner depressurize on its own—no rushing it by removing the weight or running cold water over it. Messing with the cooling process can cause liquid to siphon out of your jars or blow the seals.
Wait until the pressure gauge reads absolute zero and the canner feels cool enough to handle safely. Then carefully lift out your jars and set them on a towel-covered counter where they won’t be disturbed for 12-24 hours.
Step 7: Test Seals and Store
After your jars have cooled completely, press down on the center of each lid. A proper seal won’t move or make a popping sound. If it flexes or clicks, that jar didn’t seal—refrigerate it and use it within a few days.
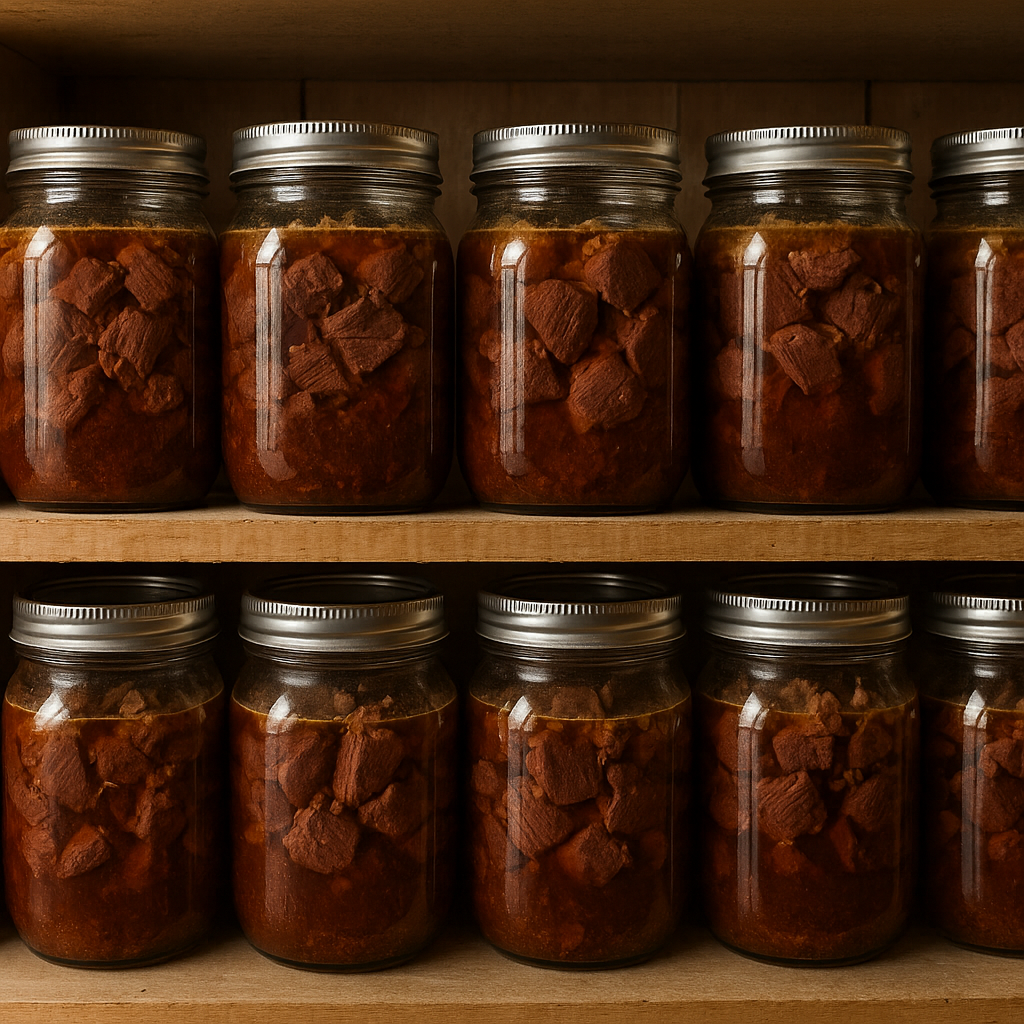
Unscrew the bands from sealed jars and give everything a wipe-down. Grab a permanent marker and label each jar with what’s inside and the date you canned it. Store them in a cool, dark spot like a basement or pantry.
One last thing: don’t put those bands back on for storage. They can rust onto the jars and actually hide seal failures by holding down lids that have come loose. Keep the lids bare for long-term storage.
How to Can Deer Meat Without a Pressure Canner
Let’s address this directly: you really shouldn’t can deer meat without a pressure canner. Some old-timers water bath can meat, and yes, people in Amish communities have done it for generations. That doesn’t make it safe by modern food safety standards.
Water bath canning only reaches 212°F, which isn’t hot enough to kill botulism spores in low-acid foods like venison. The risk might be small, but botulism is deadly—it’s not worth gambling with your family’s health over.
If you absolutely can’t get a pressure canner, your alternatives are freezing, making jerky, or preparing cured meats like salami. You could also consider getting a dehydrator for long-term storage of cooked, dried venison crumbles.
But for traditional canned venison that’s shelf-stable and ready to eat? You need the pressure canner.
Common Mistakes and Safety Tips
Never cut corners on processing time or pressure. Undercooking is the fastest way to end up with spoiled meat or worse. Follow tested recipes and timing charts exactly as written.
Don’t overcrowd jars trying to pack in extra meat. Leave proper headspace and don’t smash chunks together. The canning process needs space to work properly, and overpacked jars often fail to seal.
Label everything clearly with both contents and date. After a year, those jars of cubed venison all look the same, and you’ll want to use the oldest stock first. Most hunters rotate their canned goods, using last year’s jars while canning this year’s harvest.
Watch for signs of spoilage when you open jars. Bulging lids, off smells, or cloudy liquid mean something went wrong—throw it out without tasting it. When in doubt, pitch it. No jar of meat is worth getting sick over.
Store your jars somewhere cool and dark. Heat and light degrade quality over time. A basement or cellar works perfectly, but even a pantry is fine if it stays relatively cool.
How to Make the Most out of Canning Venison
The beauty of canned venison is how quickly it goes from shelf to table. Pop open a jar, heat it up, and you’ve got the base for countless meals. The meat’s already cooked and tender, so you’re really just warming it and building flavors around it.
Stews and chilis are no-brainers. Dump a jar of cubed venison into your pot with vegetables, broth, and seasonings. The meat’s already fork-tender, so it just needs to heat through. Same goes for stroganoff—the canned meat is perfect for that creamy mushroom sauce.
Tacos and burritos work great with canned ground venison. Brown it quickly in a skillet with taco seasoning, and you’re done in five minutes. Pull the meat from jars of pot roast-style venison for sandwiches, serving the broth on the side as au jus.
Camp cooking becomes ridiculously easy when you can throw a jar in your pack. No cooler needed, no worrying about bears getting into your food, and you’ve got a hot meal with minimal effort. Just heat and eat.
The flavor actually improves after a few months in the jar. The meat becomes more tender, and if you’ve added seasonings, those flavors really penetrate. Many hunters say venison canned with garlic and onions tastes better at six months than it did fresh. You might want to check out these marinades for venison if you’re looking for more flavor ideas for fresh meat.
Final Thoughts and Canned Venison Recipes
Canning venison gives you total control over your harvest from field to table. It’s not complicated—just methodical. Follow the rules, use proper equipment, and you’ll have safe, delicious meat that lasts for years.
The upfront investment in a pressure canner pays for itself quickly when you consider how much meat you can preserve. You’re not just storing food—you’re creating ready-made meals that save time during busy weeks or hunting season when you’d rather be in the woods than the kitchen.


