

")


Since I started ice fishing as a kid, the interest in hard water angling activity has really grown. Each year, there are more participants on the ice and the changes to the gear available to anglers gets better and better each season. There have been advancements in clothing, augers, rods, reels, lures and electronics. 

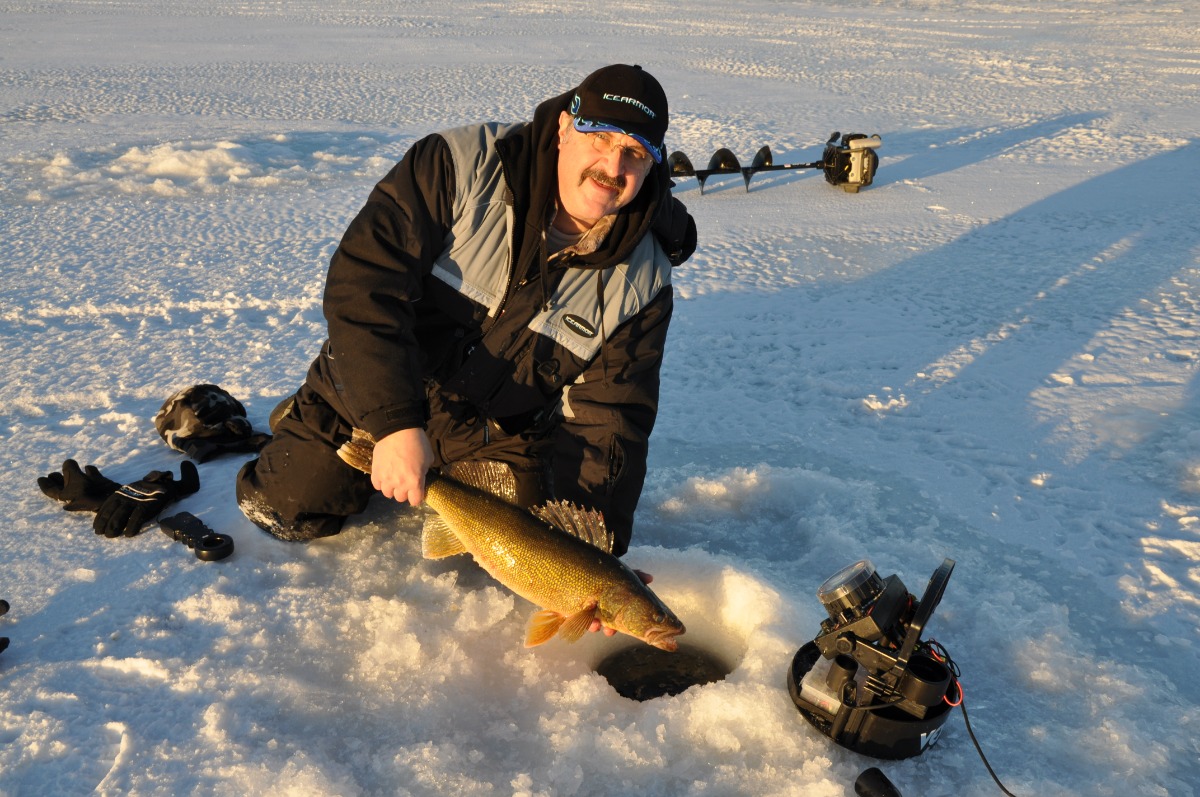
As I dropped the transducer for my flasher downhole hole, I looked at the display screen of the unit and instantly saw a wide red bar just off the lake bottom. With anticipation of knowing a fish was directly underfoot, I quickly dropped my hook down hole and watched on screen as it dropped towards the fish. When the hook was above the fish, I stopped its descent and let it come to rest above the fish. At that point, I closed the bail on my fishing reel and gave the lure the slightest jiggle. The fish instantly moved upwards and smacked it.
I say this because since I’ve started ice fishing with a flasher, I have a better understanding of how fish react to my offerings and how jigging motions can attract or repel fish. This makes my outings more enjoyable and results in me catching more fish…….so much so that I could never go ice fishing without using a vexilar flasher unit again!
How Flashers Work
A vexilar flasher is a sonar unit that sends high speed sound waves in a cone pattern called pulses through the water and then measures the amount of time for that pulse to travel to a target and return to the unit. This time variation is then displayed on the readout of the flasher by means of various colored flashing lights at the exact depths of where the targets are in the water column. These units can display multiple targets at the same time. The result is anglers being able to see real time images of the lake bottom, fish and even their lures. In ice fishing circles, the real time “targets” displayed on the flasher are referred to as “marks”.
Most flashers these days will display marks in three to five colors. Using the standard three-color flasher as a guide the marks will show in green, orange or red. Green is the weakest signal and represents fishing hooks as well as small fish or fish on the outer edge of the transducer beam. Orange is a slighter stronger signal and typically represents smaller fish directly below the transducer and larger fish on the outer edges of the transducer beam. Red is the strongest signal and is the lake bottom and larger fish directly under the transducer.
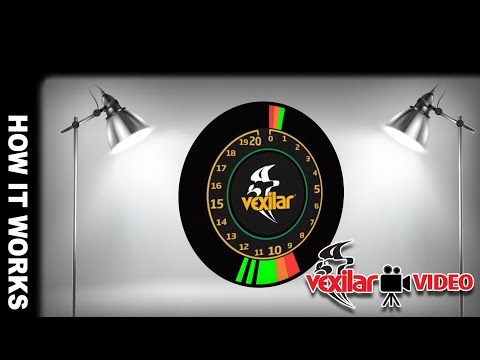
Watch this video explanation of how the Vexilar three color system works.
The keys to getting maximum results from a flasher are to set it up properly and then understanding what the unit is telling you. While flashers from different companies will have a variety of features, all flasher units should have a display face, depth range control, gain control and a transducer.
The display face is what you look at to view the flasher readings. At first glance, the display face will look like a series of flashing lights. However, you will quickly find out that each colored mark on the flasher is something directly below you.
The transducer is the part of the unit that goes into the ice hole and is connected to the flasher by a cable. On some units, the transducer is suspended in the hole by a float, while on other units it will hang by the cable. Regardless of how it goes in the hole, it should always sit level in the hole and not touch the side of the hole. For best results and to eliminate any clutter on the display face from the edges of the ice hole, the transducer should be positioned so that it’s under the bottom edge of the ice. When a fish is hooked, the transducer should be lifted out of the hole, so that the fishing line and transducer cable do not become tangled.
The depth range control is used to adjust the unit so it can be fine-tuned to the closest depth range of water being fished. The depth range control often shows the depth range and a multiplier factor for calculating depth on the display unit. A common range of depths is 0 – 20 (1X), 21-40 (2X), 41-60 (3X) and 61-80 (4X) and 81- 100 (5X). On some units, the depths of the various ranges may show on the inner rings of the display face as actual depths while on other units they will show the multiplier factor that can be applied to the outside numbers. 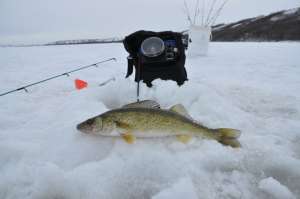

The gain control is used to fine tune the readings on the display screen. Too much gain will fill up the flasher display with interference markings, while not enough gain will result in limited target display. The key to optimal viewing is to set the gain so that your hook shows up as the weakest signal, which is often the green color.
Seeing What’s Happening
The benefit of a using a vexilar flasher is that it allows you to always see your lure and to see how fish may or may not react to your offering. When fishing with tip ups, a flasher can be used to set your baits at specific depths. Simply put the transducer in the hole and then lower your offering to the depth you want it suspended.
When using a flasher and jigging, there is no second guessing what is happening below. You’ll be able to see if any fish are down there, if they are coming near your lure or if they are rejecting or spooking from your lure. Based on the information you see; you can learn and take action to increase your chances of catching fish. The more you use your flasher, the better you’ll become at interpreting what’s happening below. The better you become at interpreting what’s happening, the more fish you will see and catch.
Instead of waiting for fish to come to you, be mobile and use the flasher to help find fish. If you’re lucky, you may start seeing fish the moment you drop your transducer into your fishing hole. If this is the case, you have a couple of options. The first is to let the lure drop naturally to the bottom with the intention of having the fish grab the lure as it drops or pin it on the bottom once it hits bottom and stirs up bottom debris. If the fish doesn’t do either, you can then wiggle the lure on the bottom or slowly raise the lure above the fish to entice a strike. The other option is to slowly drop your lure and then stop the lure slightly above the fish. In some instances, holding the lure steady works, while in other instances, it takes some jiggling to entice the fish to bite. Whatever you do, watch the flasher as it will show you exactly how the fish reacts. If your presentation spooked the fish, try something different on the next fish. If the fish nailed your offering, repeat the exact steps on the next fish.
If you don’t see any fish right away, try pulling them in by using a series of long sweeping jigging motions where your hook will flash and tumble as it drops to the bottom. If you still don’t see any fish on the flasher after 5 minutes, move to another hole and keep moving until you find fish. In some instances, fish will move in rapidly, indicating an aggressive or actively feeding fish. In these instances, larger red bars will instantly show up on your display and at times, those bars may change depth as the fish moves in or follows your lure. In other cases, the fish may be neutral or even negative and slowly move in to see what is going on. In these cases, the marks will gradually change from the weakest signal to the strongest signal.
Making It Work
Once you’ve drawn a fish in, watch the flasher to see you how the fish reacts to your next lure movements. If you continue with another long sweeping jigging motion and the fish spooks, try slowing things down the next time a fish appears on the screen. The lessons you learn with respect to how the fish are reacting will be invaluable and will serve you well on the current fishing excursion and on future outings.
Over the years, I’ve learned that fish will often be drawn in with aggressive jigging and then need to be coaxed into biting with more subtle movements. Tactics such as suspending the lure and jiggling it above the fish, dropping the lure to the bottom and twitching on the bottom or slowly moving the hook upwards and away from the fish often work wonders.

There’s nothing more exciting than watching a fish rise, follow your hook a few inches and then inhale it. Conversely, there’s nothing more frustrating than watching a fish rise with your offering and then not inhale the hook. When I have fish follow my bait and not inhale it, I will quickly reel up, change to a smaller lure and ease the offering back down over the fish. In many cases, the fish will grab the different lure right away or follow it upwards again and then strike.
When using a vexilar flasher, always trust the unit. A couple seasons back, the area indicating the lake bottom on my display screen would flash excessively with a series of extra bars and colors. At first, I thought something was wrong and bent over to adjust the gain only to have my lure rise out of the strike zone and the images disappeared. A couple minutes later the “weird “activity occurred again. This time, I ignored the markings and quit jigging as I waited for the glitch to go away, a violent strike snapped me to attention, and I set the hook on a giant walleye. Since that time, I have come to realize that it wasn’t interference that was making the screen go weird, but rather fish hugging tight to the lake bottom. Now, when I see similar series of marks appear on the display, I get ready for a strike as I know a fish is below me.
Using the Flasher for ID Purposes
A flasher can’t tell you exactly what species of fish are below, but it can give you subtle tips as to what species is below. Over time, I’ve learned that pike often appear on screen as wide red markings a few feet above the bottom mark and stay suspended for extended periods as they check out a lure. Walleye typically come in right along or very near the bottom and will often rise to take a lure. Perch typically shows up as a series of narrow red or orange markings and can be either above or below your lure.
While watching the flasher screen, don’t just focus on the bottom region near your lure. Look at the entire water column to see if any suspended fish float in. Suspended fish can often be fish of any species such as trout or whitefish and are always worth checking out. The best way to do so is to reel your lure above the fish and wiggle and twitch the lure to entice a strike.
With a little practice, you can tell the size of the fish below because the thickness of the red mark correlates to the size of the fish. You can also tell a fish’s attitude by the way its mark on your screen behaves. Aggressive biters will race along your display, while neutral fish will hardly move.
A flasher can be used to determine the makeup of the lake bottom. A hard bottom will show as a thin mark and the softer the bottom, the thicker the bottom mark will be. With this knowledge it is easy to find the transitional area between hard bottom and soft bottom.
High Tech
For years, the standard for flashers was 3 color displays using a series of brushes to display information. In more recent times, the flasher units have incorporated brushless technology and bright LED screens. Vexilar, who is a leading manufacturer of flashers has taken things to the next level, by introducing Auto Zoom, which allows you to split the screen, so you see the bottom 6, 12 or 18 feet on one side of the flasher and the entire water column on the other. They have also added units with multi color displays and features to operate the units in a low power mode for shallow water fishing applications. In 2021, they released their Broad Band Transducers and put them on their new FLX 30 BB units. This new broad Band Transducer allows the user to change between 7 different operating frequencies ranging from 160khz to 300khz, making it like 7 flashers in 1 as majority of other flasher units utilize transducers that run at a standard of 200khz.
I have used the FLX30BB since it was released and quickly learned the lower the frequency the wider the transducer beam and the higher the frequency the narrower the beam. With that knowledge, I discovered a wide beam can be used to search a larger circular area below for fish while a narrower beam can zoom right in on fish directly under me. I also discovered that when fishing steep ledges, the narrow beam resulted in much more accurate readings of what was below me and didn’t show me a double bottom reading like a wider beam would do.
Vexilar Flasher Care
When moving from hole to hole, pick up the transducer and carry it with the flasher unit instead of dragging it along the ice. Doing so prevents the transducer and cord from becoming damaged.
After each fishing trip, bring the flasher inside and let it warm up to room temperature. Once the unit is at room temperature, wipe down the unit to remove water spots and condensation. Then recharge the battery so it’s fully charged and ready to go for your next outing.
For more Ice Fishing Articles – Check out Lisa Roper’s “Fish On”


 in a Super Black Eagle 3")


