Flat Is Where It’s At!
I grew up hunting waterfowl in dry field hunting locations. I remember my earliest hunts where my buddies and I would miss school to lay on our sides covered by a burlap blanket and wait for the ducks and geese to come to us. These were the first layout blind designs, pretty archaic! Sure, we shot some birds, but often by the time we would roll over and sit up many of the birds would be out of range. In addition, we often came home cold, wet and sore from laying on the ground. During those hunts it was apparent that there was definitely potential to being as low to the ground as possible. As time marched on we started digging and hunting out of ground pits. The birds moved on a daily basis so we would have to dig a new pit for each hunt. Digging and filling in holes was a lot of work, but wow did those pits work as the birds had no idea we were hiding in the field and we were always ready for them as they approached. Almost 25 years ago, I was invited on a waterfowl hunt in my home province of Saskatchewan with some of the crew from Avery Outdoors who travelled to hunt birds in the northern range of the migration route. It wasn’t long after meeting up with my buddies, that they showed me prototype versions of the new Avery Finisher Layout Blinds they had brought with them for us to use and field test. This was my introduction to layout blinds, and the experience never left me.
Layout Blinds – a new generation
Right from the start, I could see how the new generation of ground blinds were light weight, portable, comfortable and easy to hunt from. We had a series of great hunts and when we all headed for home, I had a couple of blinds in the back of my truck to hunt with and provide product feedback.
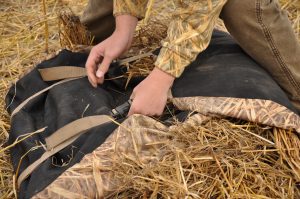
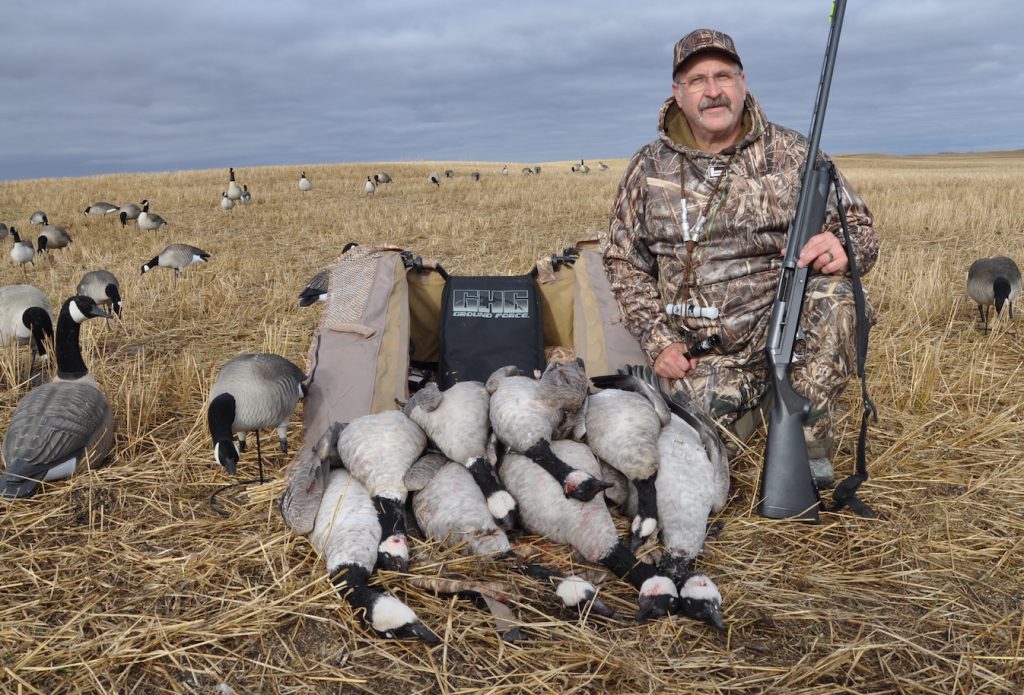
Over the course of several years, refinements were made to the blinds to help make them more compact, easier to open and close, lower profile and easier to attach stubble/weeds to them. Avery currently makes a variety of layout blinds, including my favorites, the super low profile Power Hunter Blind which I use in pea and lentil fields and the slightly higher profile Ground Force Blind which is my go to blind when hunting in wheat, barley and oat stubble. Here are some great options for layout blinds:
Avery Power Hunter Waterfowl Blind (click to purchase)
Avery Ground Force Layout Blind (click to purchase)
Avery Finisher Layout Blind (click to purchase)
Avery Finisher White Layout Blind (click to purchase)
Alps OutdoorZ Legend Layout Blind (click to purchase)
Over years of using layout ground blinds for hunting waterfowl, I’ve discovered and learned a number of tricks to help make these blinds work to their fullest capacity. Check them out below and see if you can incorporate any of these tips into your next waterfowl hunt from a layout blind.
Get Rid of the Shine on Your Layout Blind
Brand new layout blinds right out of the box look sharp. Unfortunately, the brand-new camo or khaki material used on the blinds has a sheen to it that incoming birds can see, even in low light conditions. So, to prevent flaring birds, it is imperative to dull the material on a new blind prior to using it. Over the years, I’ve learned two methods to take the sheen away. The first method is to grind mud into the blind and the second is to apply a light over spray paint coating to the blind. I know doing so goes against everything we’ve ever learned about taking care of our stuff, but you must trust me on this!
To mud a blind, you simply mix dirt (preferably some that is local to your hunting area) and water together in a pail to create mud. Once you achieve a thick paste, take that mud and smear it all over your blind. To help ensure it gets rubbed into the grain of the fabric, use a stiff corn broom or your hands to grind it in. After the blind is completely mudded, let the mud fully dry. Once it’s dry, take a clean broom and sweep off the dried mud residue from the blind. When you’re finished, you will still see the camouflage or khaki material, however, that material will have a dull matte finish that will not spook any birds.
If you don’t have the time or resources to mud a blind, you can also dull the blind’s fabric by applying a thin coating of matt finish spray paint over the entire blind’s surface. I like to use a paint color that blends into the environments I hunt and over the years have had great success with Rust-oleum’s American Accents spray paints. When dulling a blind with spray paint, I suggest applying just enough spray paint to take away the shine while still being able to see the color of the blind material.
Adding Vegetation to Camouflage Your Layout Blind
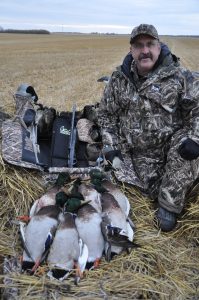
While it’s possible to use a layout blind that has just been mudded or dulled with spray paint on its own, it will be more effective if you brush your blind with vegetation from the area being hunted, so it blends in perfectly and has a more 3D appearance.
Most blinds on the market have special straps sewn onto them for attaching stubble or vegetation. These straps allow you weave bunches of vegetation through them. For best results, try to loop the vegetation through multiple loops. If you do, it will stay on the blind when you flip open the doors to get in and out and to shoot. When you brush it, the blind should look like part of the field.
Make sure to brush your blind prior to each hunt using vegetation from the field you are hunting. Instead of gathering up vegetation from the immediate area where your blind and decoys will be positioned, gather up your brushing material a couple of hundred yards away from your blind location and the potential flight path of incoming birds. By doing so, your blind will look just like the surrounding field and there will not be obvious and unnatural open holes of exposed dirt around your blind.
A good way to gather stubble is to rake it up. For most stubble varieties, an open tooth rake works best. A set of yard clippers works well if you need to cut down vegetation. When hunting with a group, have one hunter gather stubble from surrounding areas and carry the stubble to another hunter who will weave the stubble onto the blinds. As this is happening, the other hunters in the group can set up decoys and then move vehicles away from the hunting area.
Another option to using natural vegetation for brushing your blind is to use commercially made brushing material. A number of companies dye natural grasses and Raphia to match various stubble field environments such as wheat, pea and corn stubble. Some even offer green to match fall rye and grass fields. Even when using artificial brushing material, I will also try to weave in some natural vegetation to ensure the blind blends in with the area being hunted.
While some hunters feel you can’t over brush a blind, I believe you can. For example, in sparse fields, if you use too much vegetation, your blind will look very obvious and be the focal point where the birds focus their attention as they move towards the decoy spread. As well, if you use too much brushing material, the doors on your blind may not open or close properly.
Hiding In The Field with a Layout Blind
Over the years, ducks and geese have become more aware of the presence of ground blinds. So, when setting up your blind, look for areas where the farmer may have left the stubble a little higher than other areas of the field and set the blind up in or along the higher stubble.
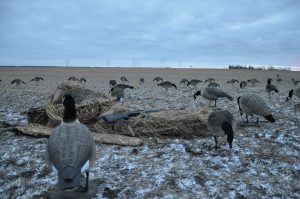
At first glance, such areas will be very subtle and seem very insignificant. However, the extra 6 – 12 inches of stubble can make the difference between a good hunt and a spectacular hunt. If high stubble isn’t present, you can also look for small straw piles or tiny weed patches to set up your blinds. A word of caution regarding weed patches is that ducks and geese are typically accustomed to hunters hiding in large weed patches, so avoid setting up your blinds in larger patches of weeds that would be capable of holding a hunter.
Below Ground Level Layout Blinds
Another great trick to help a layout blind disappear is to scrape out a shallow pit in the ground and then set the blind up inside the pit. While it’s best, if you can get the entire blind below ground level, even a pit that is two to three inches deep can make a huge difference.
When digging such pits, take into consideration where you will put the dirt that you dig out. The dirt you dig up may be a different color than the surface dirt and if so, will be a warning signal to incoming birds. As well, the benefit you gain from digging the blinds in may be lost if you have large dirt mounds around your sunken blinds.
For shallow pits, you can probably get away with spreading some of the dirt around the area where your blind will go and then covering the exposed dirt with stubble. For deeper pits that get your blind below ground level, you may want to place that dirt in small piles and cover it up by placing shell decoys over top of the piles.
Digging blinds in doesn’t have to be restricted to dirt. If swaths are present in the field being hunted, position your blind right in a swath and you and your blind will be completely hidden from incoming birds. When digging pits or moving swaths around, always ask the landowner for permission before doing so and advise the landowner you will return the area back to its original status once the hunt is over.
Making Hill Top Hunts More Successful using Layout Blinds
There are those hunts where the ducks and geese want to land and feed on hilltops. Such hunts are often late season hunts when birds have experienced plenty of pressure. Under these conditions, it becomes very difficult to hide a blind because if set up on the top of the hill or the downwind side of the hill, you run the risk of being pinpointed by approaching birds. Thus, for hilltop setups, you are best to position your layout blinds just below the crest of the hill on the upwind side of the hill so you will be completely hidden from incoming birds while still being able to see down the hill and watch them as they approach.
When deploying such a setup, it’s also advisable to create a landing zone on the top of the hill. This can be achieved by running lines of decoys that start on the downwind side of the hilltop and run right to the top of the hill and into the open landing zone. By doing so, you’ll force the birds to fly towards the landing zone and focus their attention into this pocket. When they attempt to land, they will be out front and tight to your blind.
Pairing Up using Layout Blinds
Getting hidden when hunting in larger groups or in very flat fields with limited cover can often pose a problem, even for hunters using layout ground blinds. Under these difficult circumstances, it’s advisable for you to group your blinds together in pairs. If hunting over a small spread of decoys such as when hunting Canada geese, the pairs should be spaced very closely together. When hunting over a large spread of decoys such as a snow goose spread, you can put large spacings between the blinds.
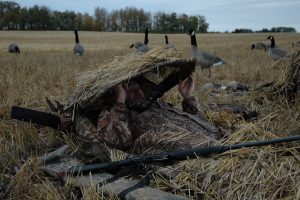
When setting up in pairs, the blinds should be tight together with little to no spacing between the blinds. The idea is to reduce the number of blinds you have to hide in your set up. Experience has proven that it’s easier to hide four or five pairs of blinds within the decoys than it is to hide eight or ten individual blinds.
While firearm safety is always important when hunting, it becomes even more important when hunting side by side from layout blinds. Under these circumstances, each hunter in the pairing has to know and stay within his or her safe line of fire. Anything short of that is totally unacceptable and could come with consequences. As well, each pair of hunters must be aware of where the other blinds and hunters are set up.
Using Decoys to Your Advantage
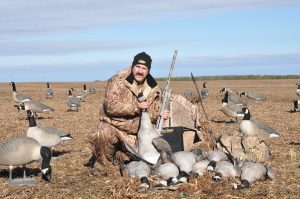
Decoys can be set up around and within close proximity of a layout blind to help hide the blind and break up its profile. When setting up decoys around your blind, position decoys so that some decoys are visible no matter what angle the birds come from. This means positioning decoys on all four sides of the blind. As an added bonus, decoys around the blinds will also block some of your hunting movements such as calling or rising up to shoot.
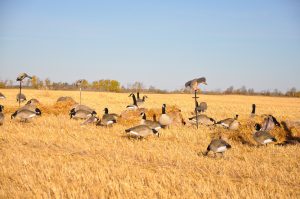
When setting up decoys out front of the blind, make sure the decoys don’t block your line of vision down range and prevent you from seeing the action unfold. With that said, make sure the decoys still block some of the blind. Often what I’ll do is position a decoy out front so I can look over the lower portion of the decoy’s tail and let the neck and head area of the decoy help conceal my blind.
Maximizing Your Shooting Lane with a Layout Blind
When hunting out of a layout blind, most shooters find that they can only pivot their upper body and this limits their range of motion and shooting lane to approximately 150 degrees. Therefore, proper positioning of your blind is crucial so that you don’t miss out on any shooting opportunities. If you are a right-handed shooter, you should angle the foot of your blind approximately 45 degrees to the right of where you anticipate the birds to land or fly past. By doing so, you’ll maximize your shooting zone and you’ll have ample range of motion to swing your shotgun while shooting from a sitting position. Left-handed shooters should angle the foot of their blinds to the left.

When hunting in group situations, always remember your shooting lanes. Never shoot over top of other hunter in blinds. Never sit up, turn onto your knees and shoot backwards at passing or fleeing birds as this will create a dangerous situation for all involved.
Water Hunts with a Layout Blind
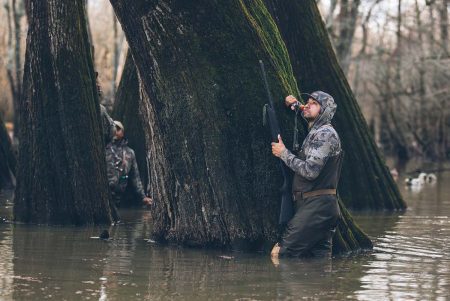
Many hunters utilize layout blinds to hunt exclusively in stubble fields. However, layout ground blinds work great along the edges of potholes, on levies and on islands situated on big water. Some models are even waterproof or have waterproof accessories and can be partially submerged in shallow water areas.
One of my favorite places to set up a layout blind is along the water’s edge of a slough that has dried up over the summer and fall and is simply now just a water body surround by open ground and a distant ring of vegetation. With the right amount of vegetation, the blind will blend into the shoreline to look like the remains of an old muskrat house or clump of weeds.
Some Final Tips on using a Layout Blind
A layout blind will hide you, but not your motions. Once you are inside your blind don’t fidget and move around as incoming birds will easily pinpoint you based on your motions. Stay still until it’s time to shoot. Don’t let your excitement get the better of you. Pick one guy in your group to be the look out and call the shots while everyone else stays still.
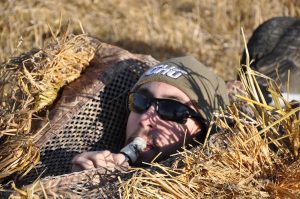
On cold days, it’s imperative that you dress warmly in layers to prevent the shivers from setting in and causing you to start moving around to stay warm. Don’t overlook your base layer as that is your most important layer. Under Armour ColdGear is a wonderful base layer as it wicks away any sweat you may have worked up setting up decoys and preparing your blinds, while still providing you a good insulating layer to help keep you warm. Since you’ll be on lying on the ground, wear some type of insulated bibs and jacket such as the Banded Calefaction Bibs and 3-N-1 Insulated Jacket as the bibs will keep you warm and dry and the jacket will give you layering options.
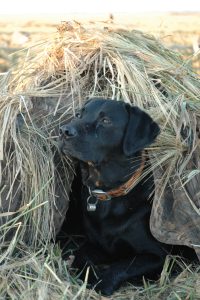
Layout blinds are not just for humans. In fact, you can get a layout blind for your retriever to stay hidden in the field. When using a layout dog blind, set up the blind just slightly behind you so your dog is safely out of the line of fire and can watch the action unfold to stay on top of downed birds.
Per our affiliate disclosure, we may earn revenue from the products available on this page. To learn more about how we test gear, click here.

